Your Workspaces
What are workspaces?
Polly workspaces allow you to declutter and organize your data in a folder system of choice. This can be accessed by clicking on the Workspaces icon in the side panel.

Figure 1. Polly Homepage
To access workspaces,
- Click on the workspace icon in the sidebar to view your workspace, or click on the new workspace icon at the top to create a new workspace.

Figure 2. Workspace Cardview
-
There are 2 panels on the workspace interface.
-
The panel on the right shows you the details around the content within the workspace.
-
The middle panel shows you all the content within the selected workspace.
-

Figure 3. Workspace Panel View
Creating a workspace
You can create a new workspace on Polly by clicking on New Workspace on the left panel of the workspace interface.

Figure 4. Creating a New Workspace
Enter the Name of the workspace, custom tags and description (if any) and click on save. Users can add tags while creating a new workspace. These tags can be used later to search and identify workspaces.
The new workspace will be created. You can find the newly created workspace with the list of all your workspaces.
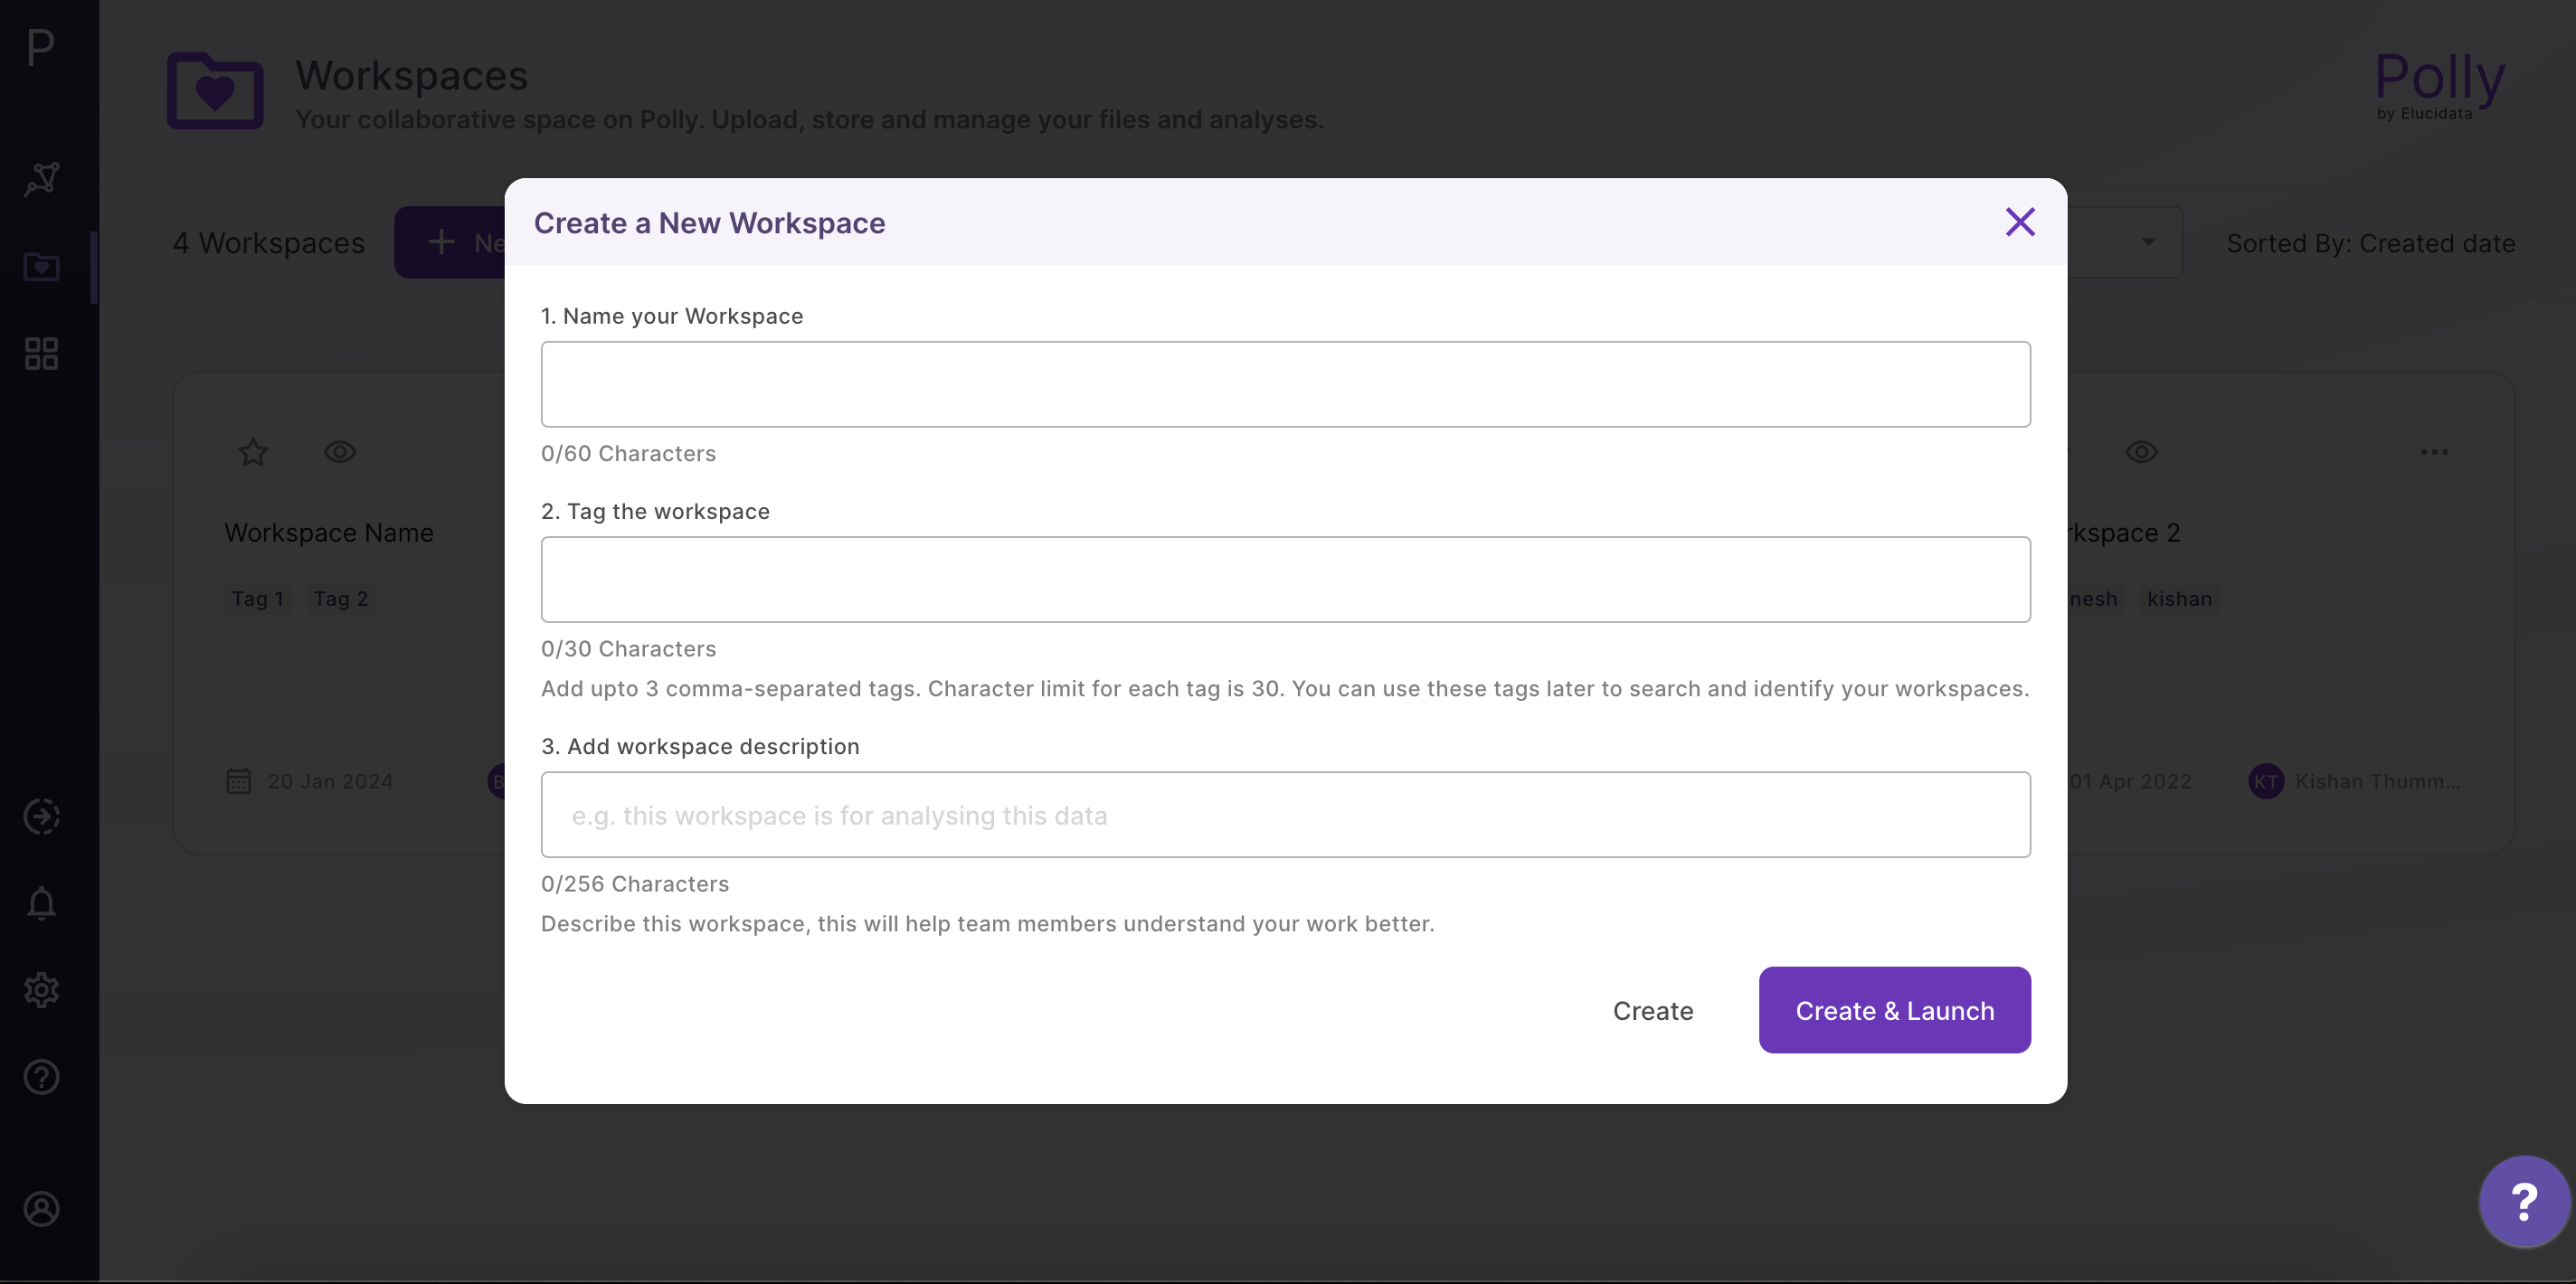
Figure 5. Add Name, Tags, Description of a Workspace
Watching a Workspace
Users can watch a particular workspace by clicking on the ‘eye’ icon. This feature allows the user to monitor changes made in the workspace.

Figure 6. Watching a workspace
Mark a Workspace as Favorite
Users can mark a particular workspace as their favorite by clicking on the ‘star’ icon. This feature makes it easier for the user to filter frequently used workspaces.
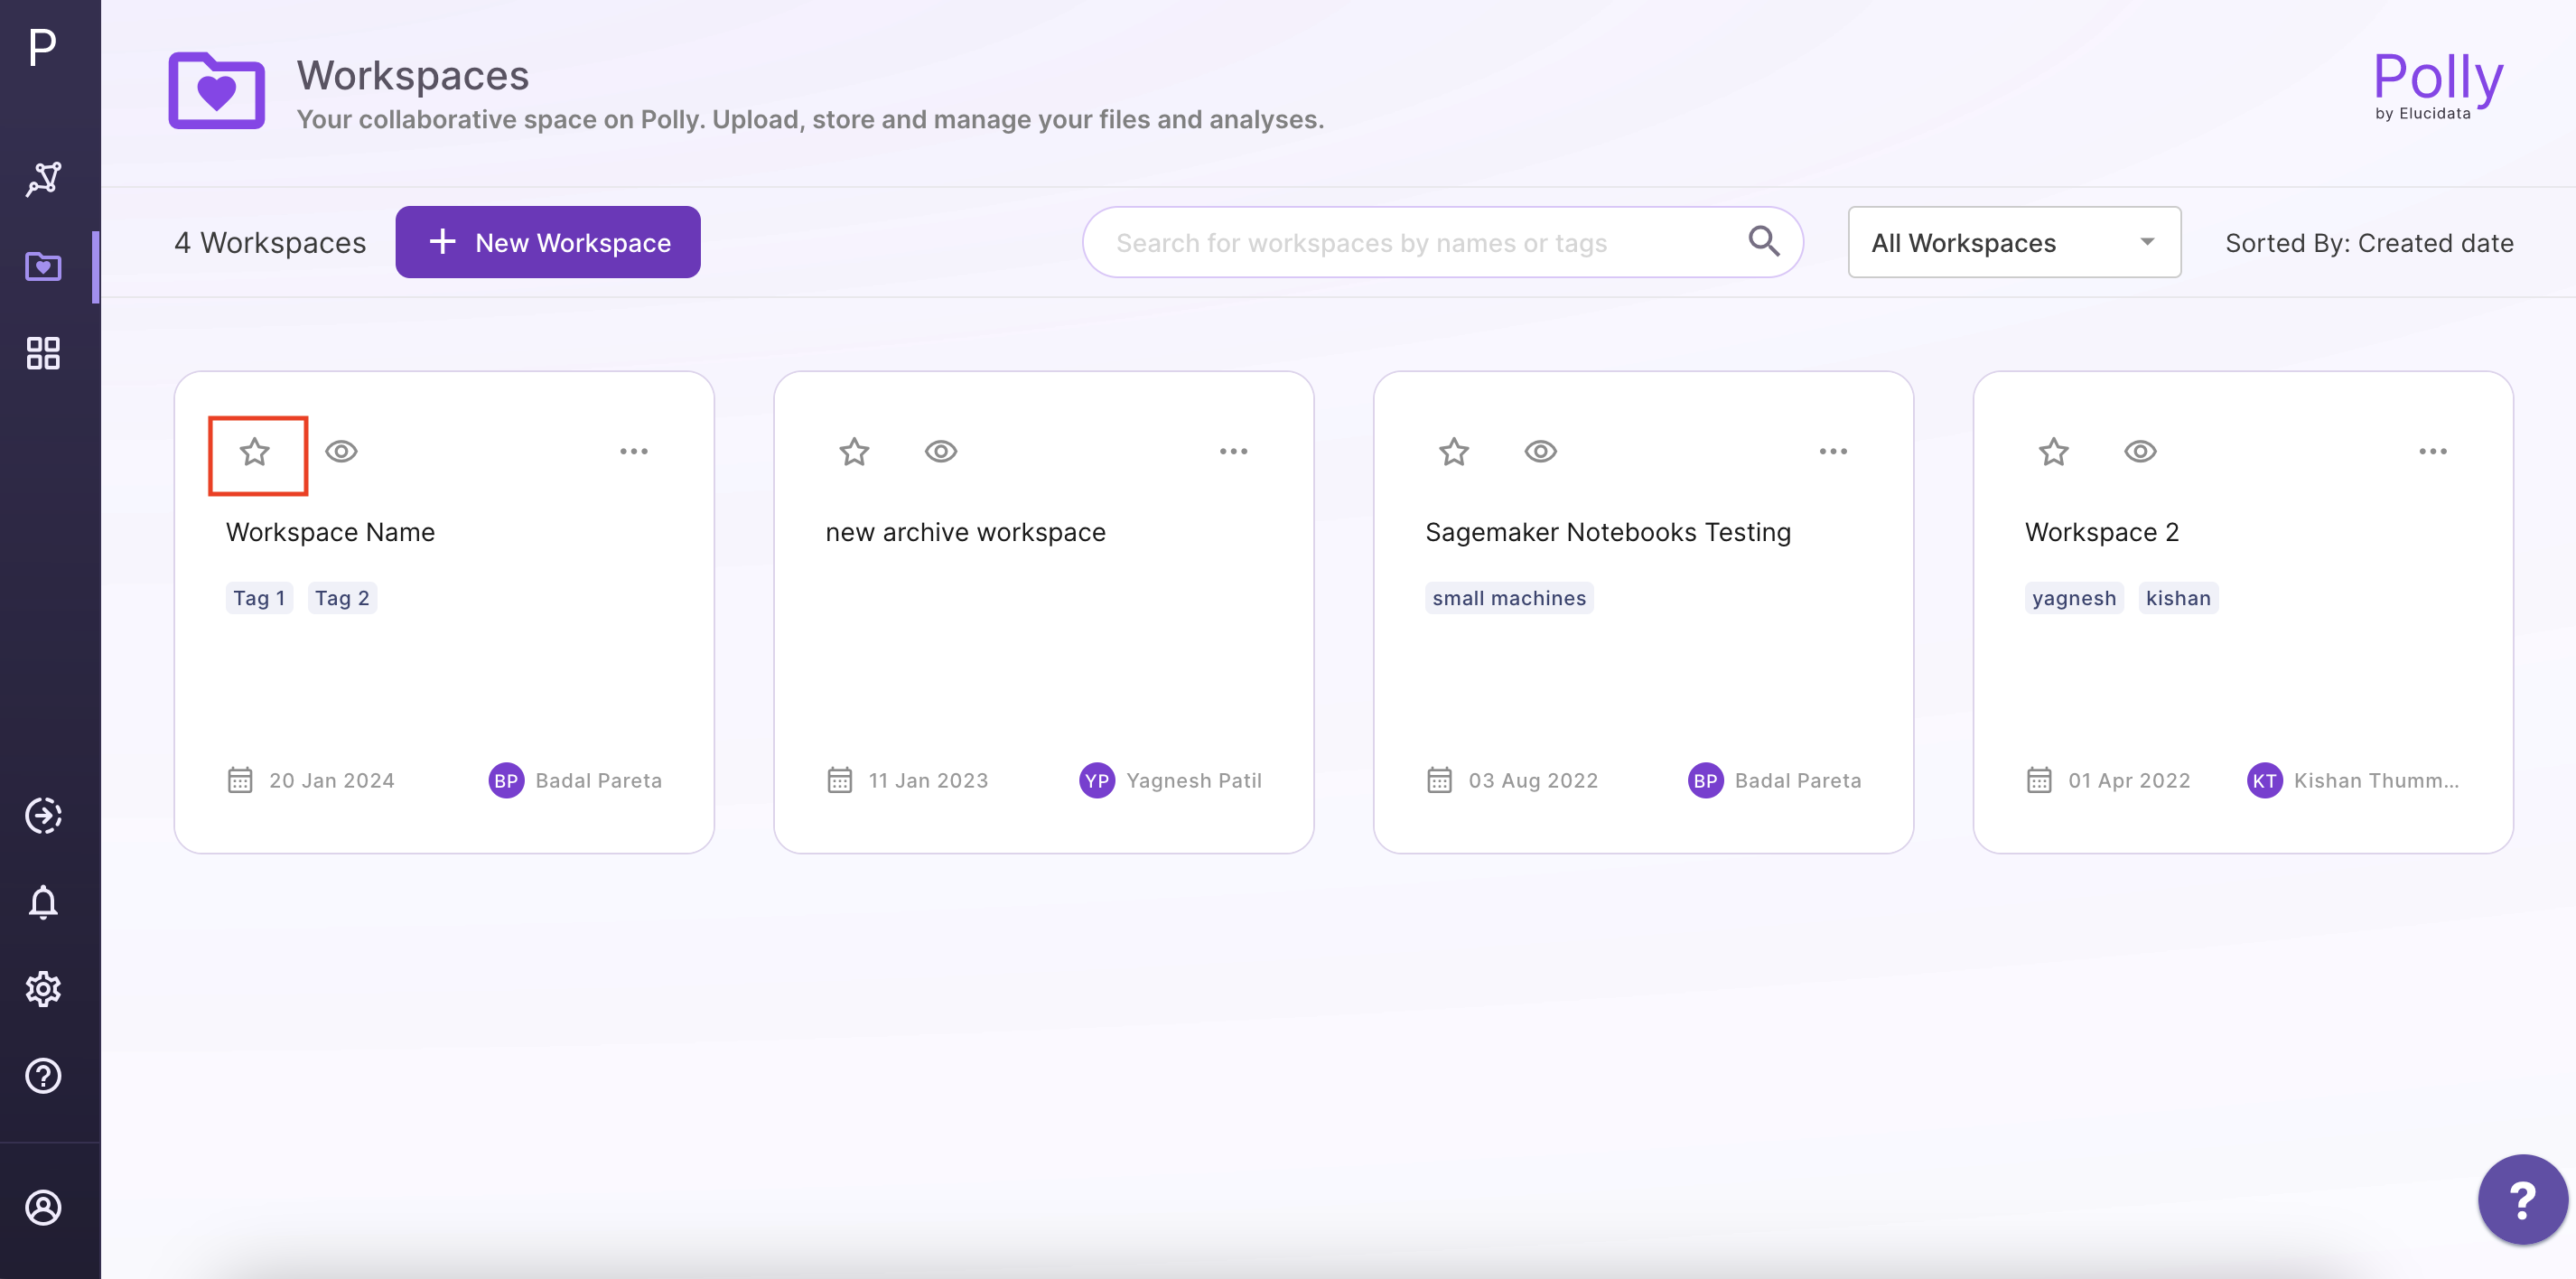
Figure 7. Mark a workspace as favorite
Filtering Workspaces
Users can filter workspace cards of choice using options like:

Figure 8. Filter Workspace cards
The overview about the contents of the workspace can be seen on the right panel.
Figure 9. Workspace Right Panel.
Workspace information
The description of workspace and other information can be accessed through the Info option by clicking on the workspace menu.
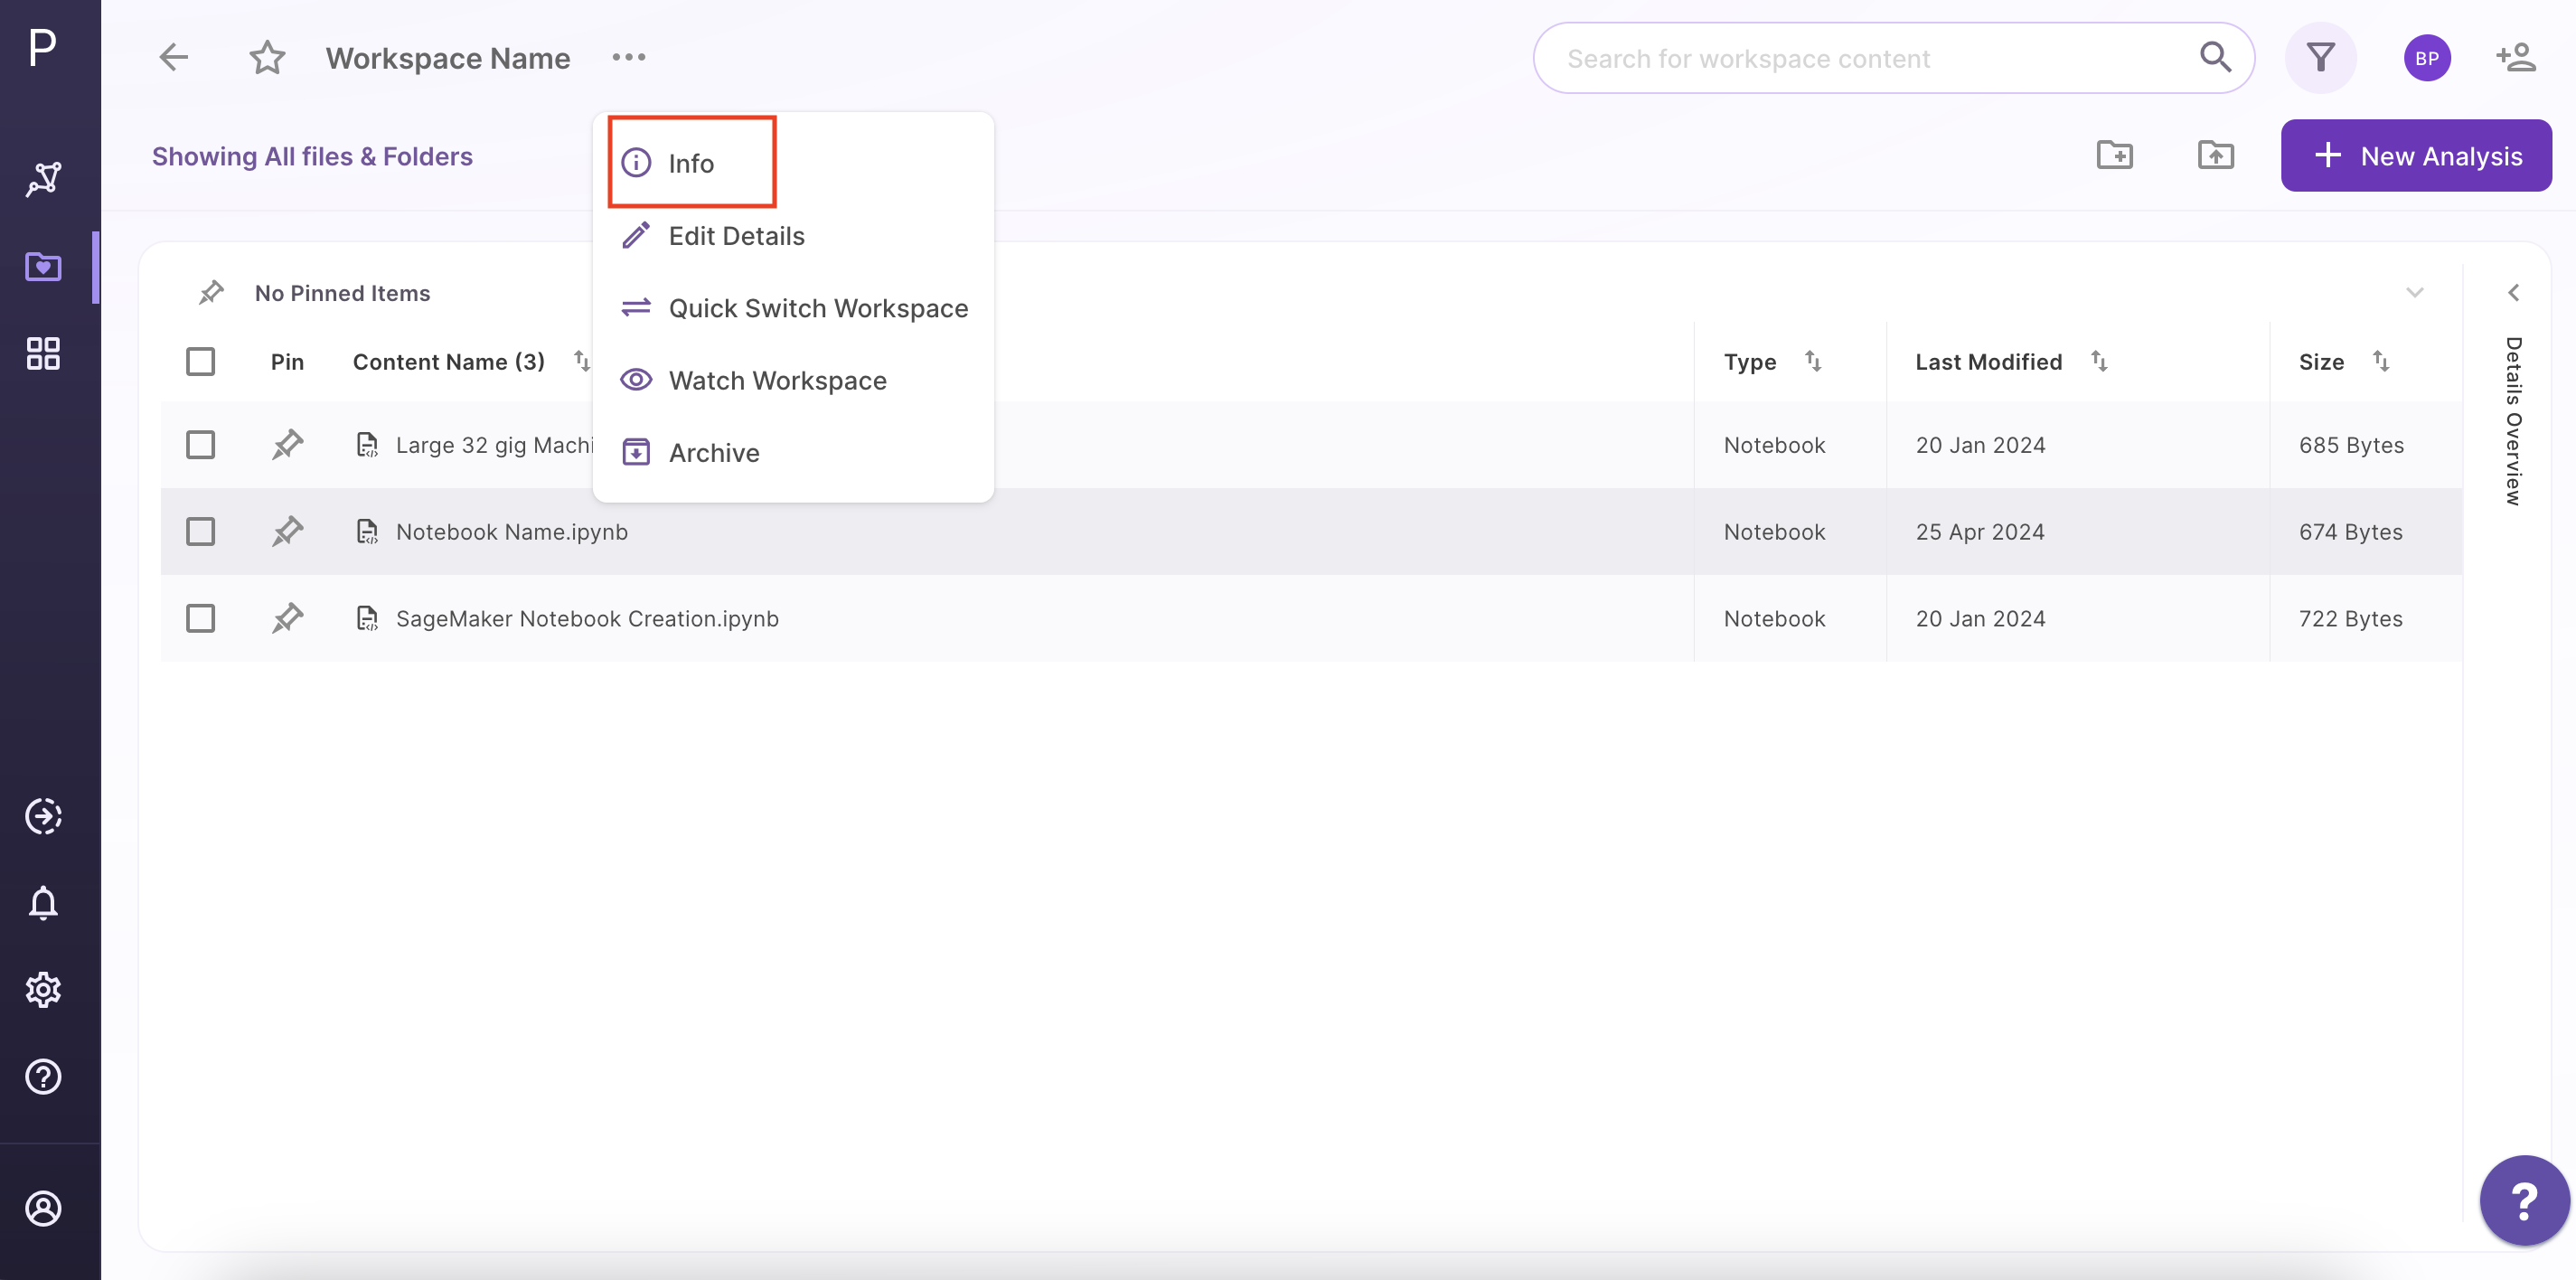

Figure 10. Workspace Information
Content within a workspace
A workspace contains all your data, analyses,notebooks, and reports. They can be accessed through the center panel.
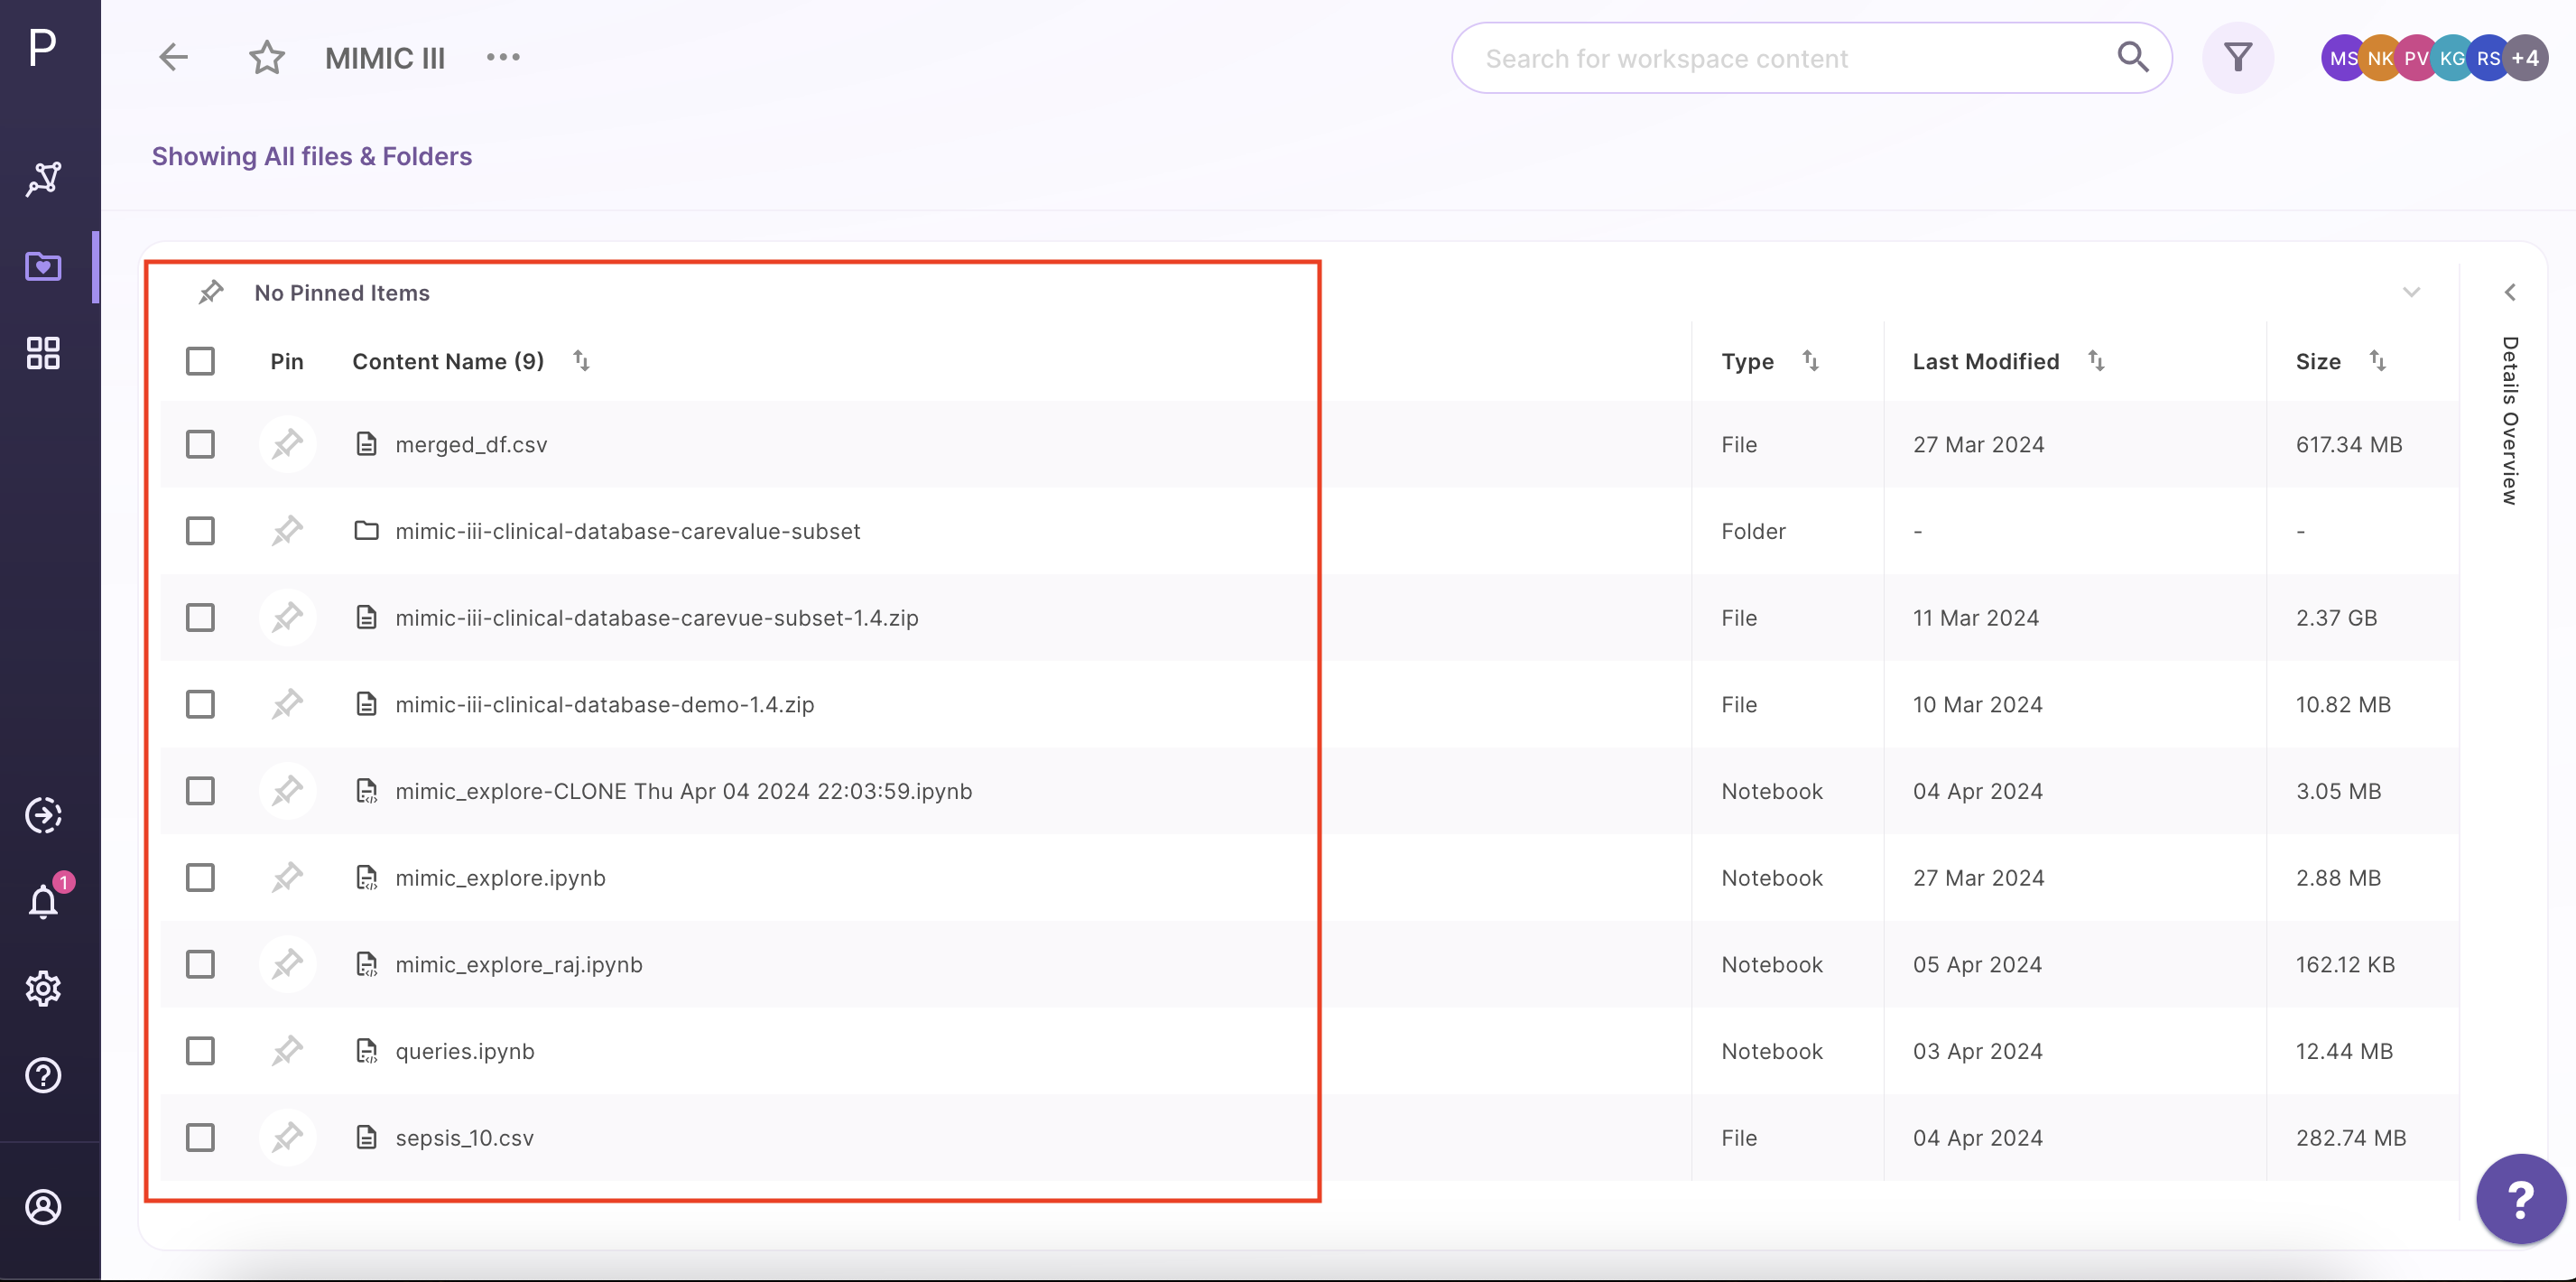
Figure 11. Workspace Contents
Filtering the content
In order to reduce the clutter, workspaces allow you to filter the content you want to display within the middle panel. Click on Filter icon above the middle panel where you can select/deselect the file type you would want to show in the workspace. Once the selection is done click on Apply to confirm your selections.

Figure 12. Content Filtering
Creating a New folder
Polly workspace allows you to organize and manage your data in folders and subfolders. To create a folder, click on the Create a New Folder icon.
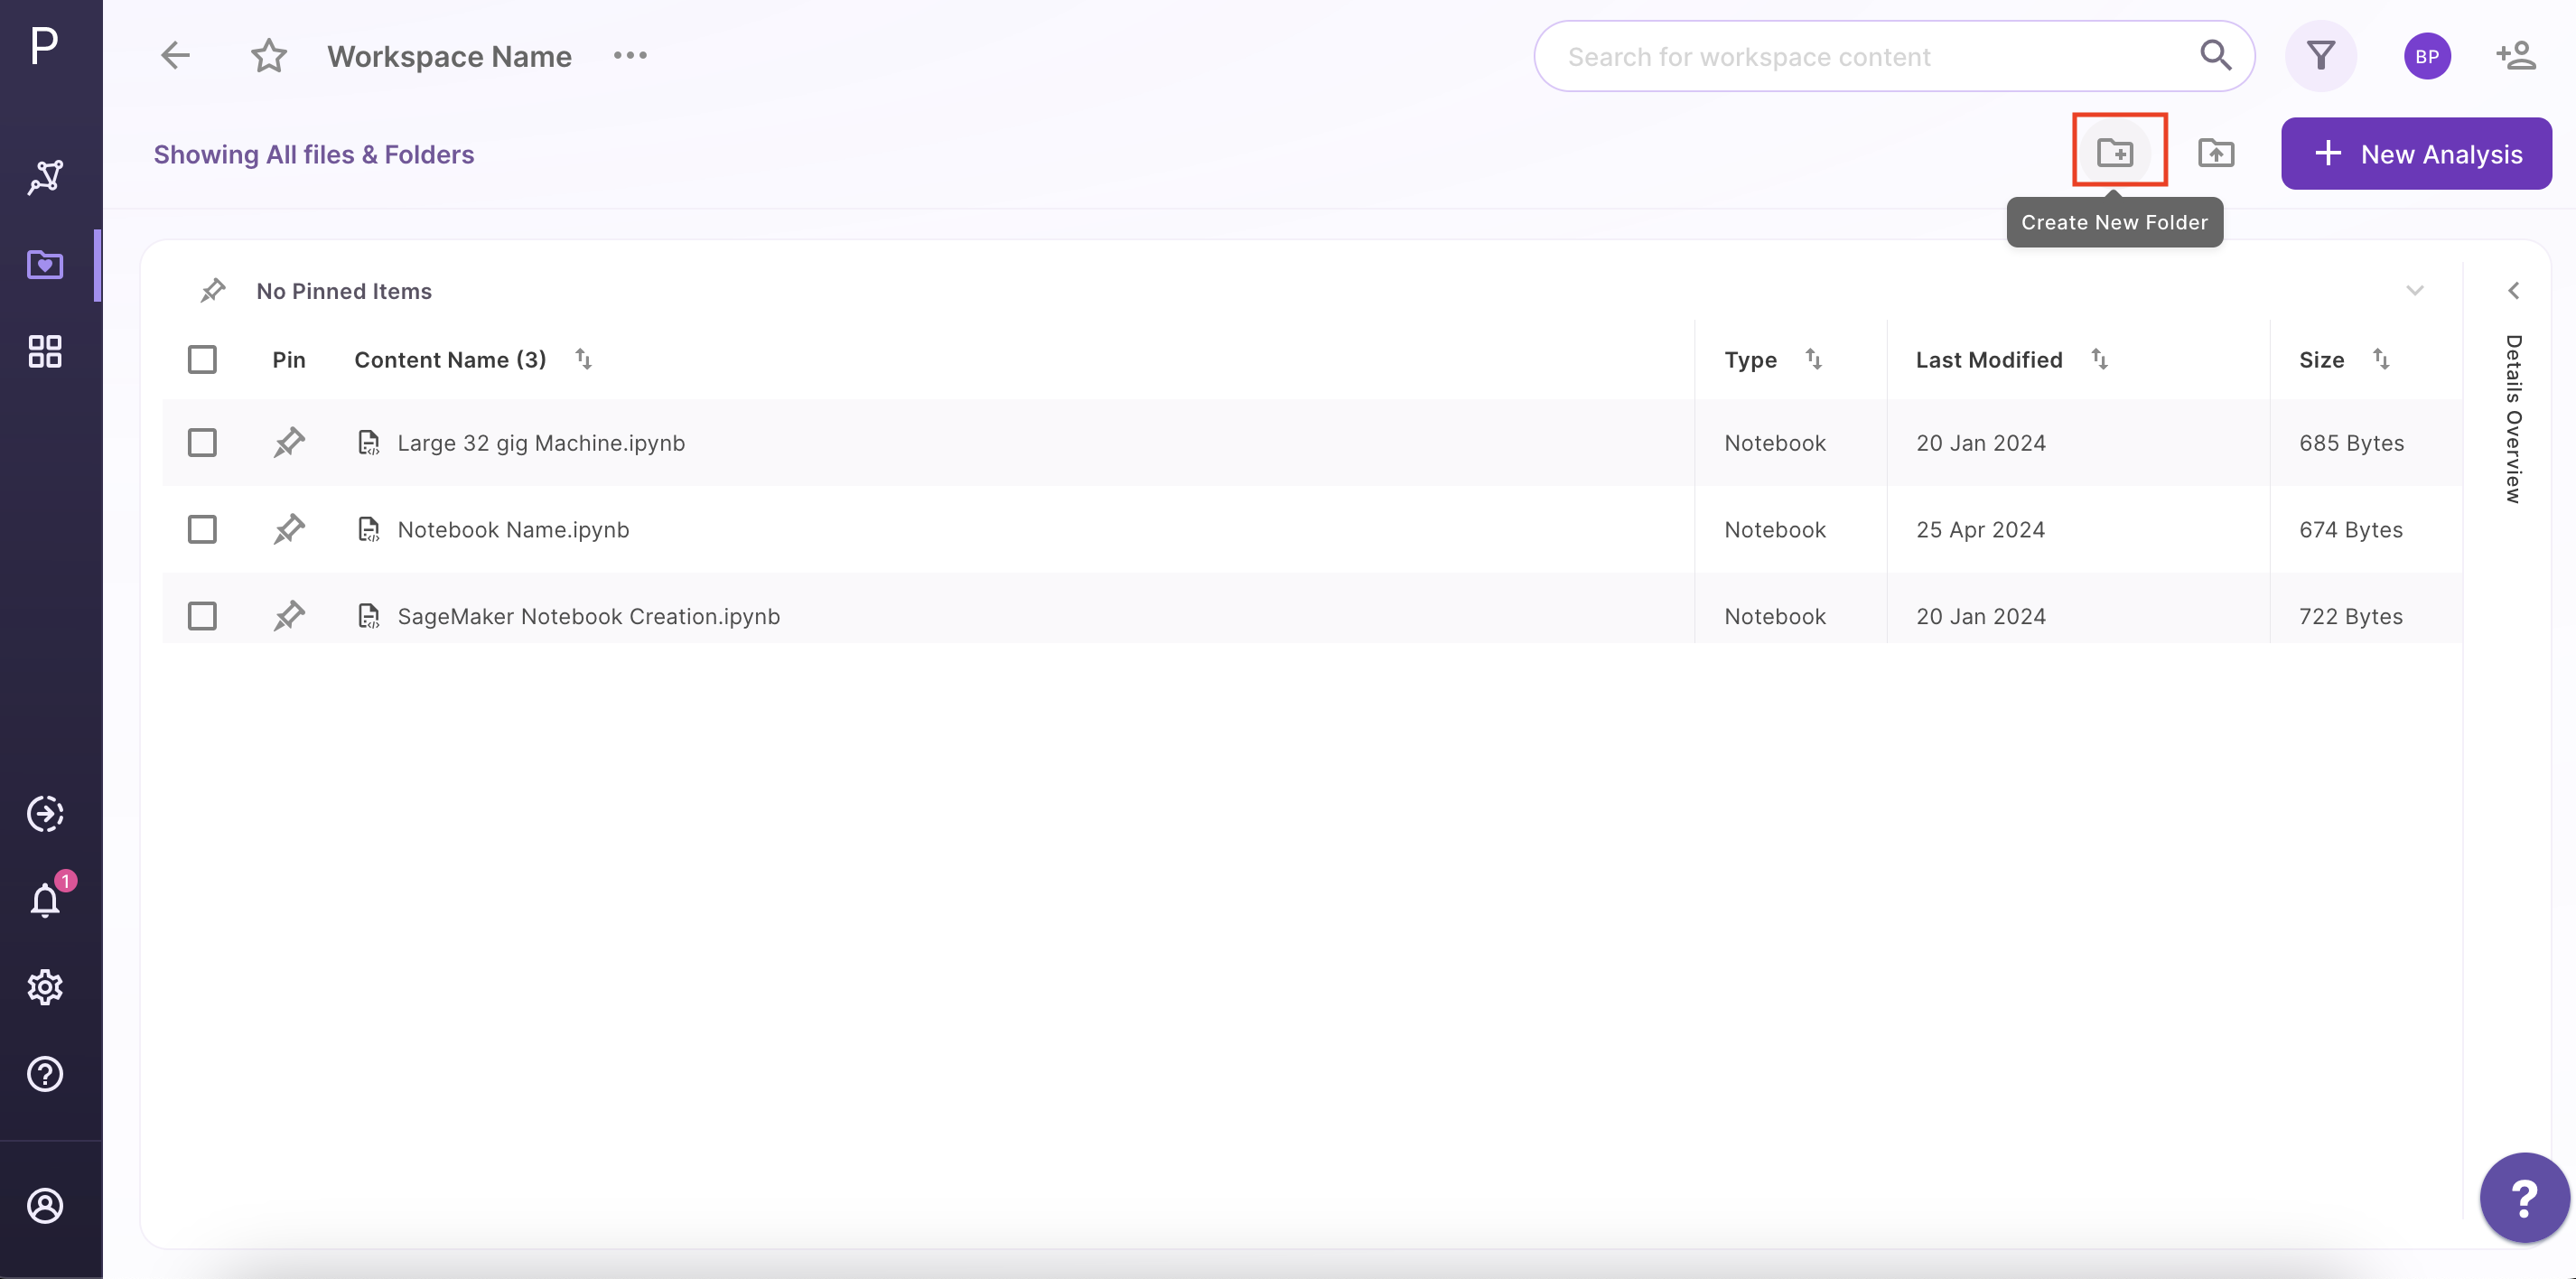
Figure 13. Create Folder
Enter the name of the folder you want to create and click on Create Folder.

Figure 14. Add Folder Name
You can click on the same icon again to upload files within the created folder.
Note:
-
Data files and notebooks can be organized within a folder while analyses are stored outside a folder in the selected workspace. In case of notebook uploads, the notebook are always uploaded in the root directory of the workspace (outside a folder). However, once uploaded, it can be moved to a folder if required.
-
Users will receive an email notification whenever they are added to a new workspace, their role changes, or they are removed from a workspace.
Navigating through a folder
Double click on the folder name to look at its contents.
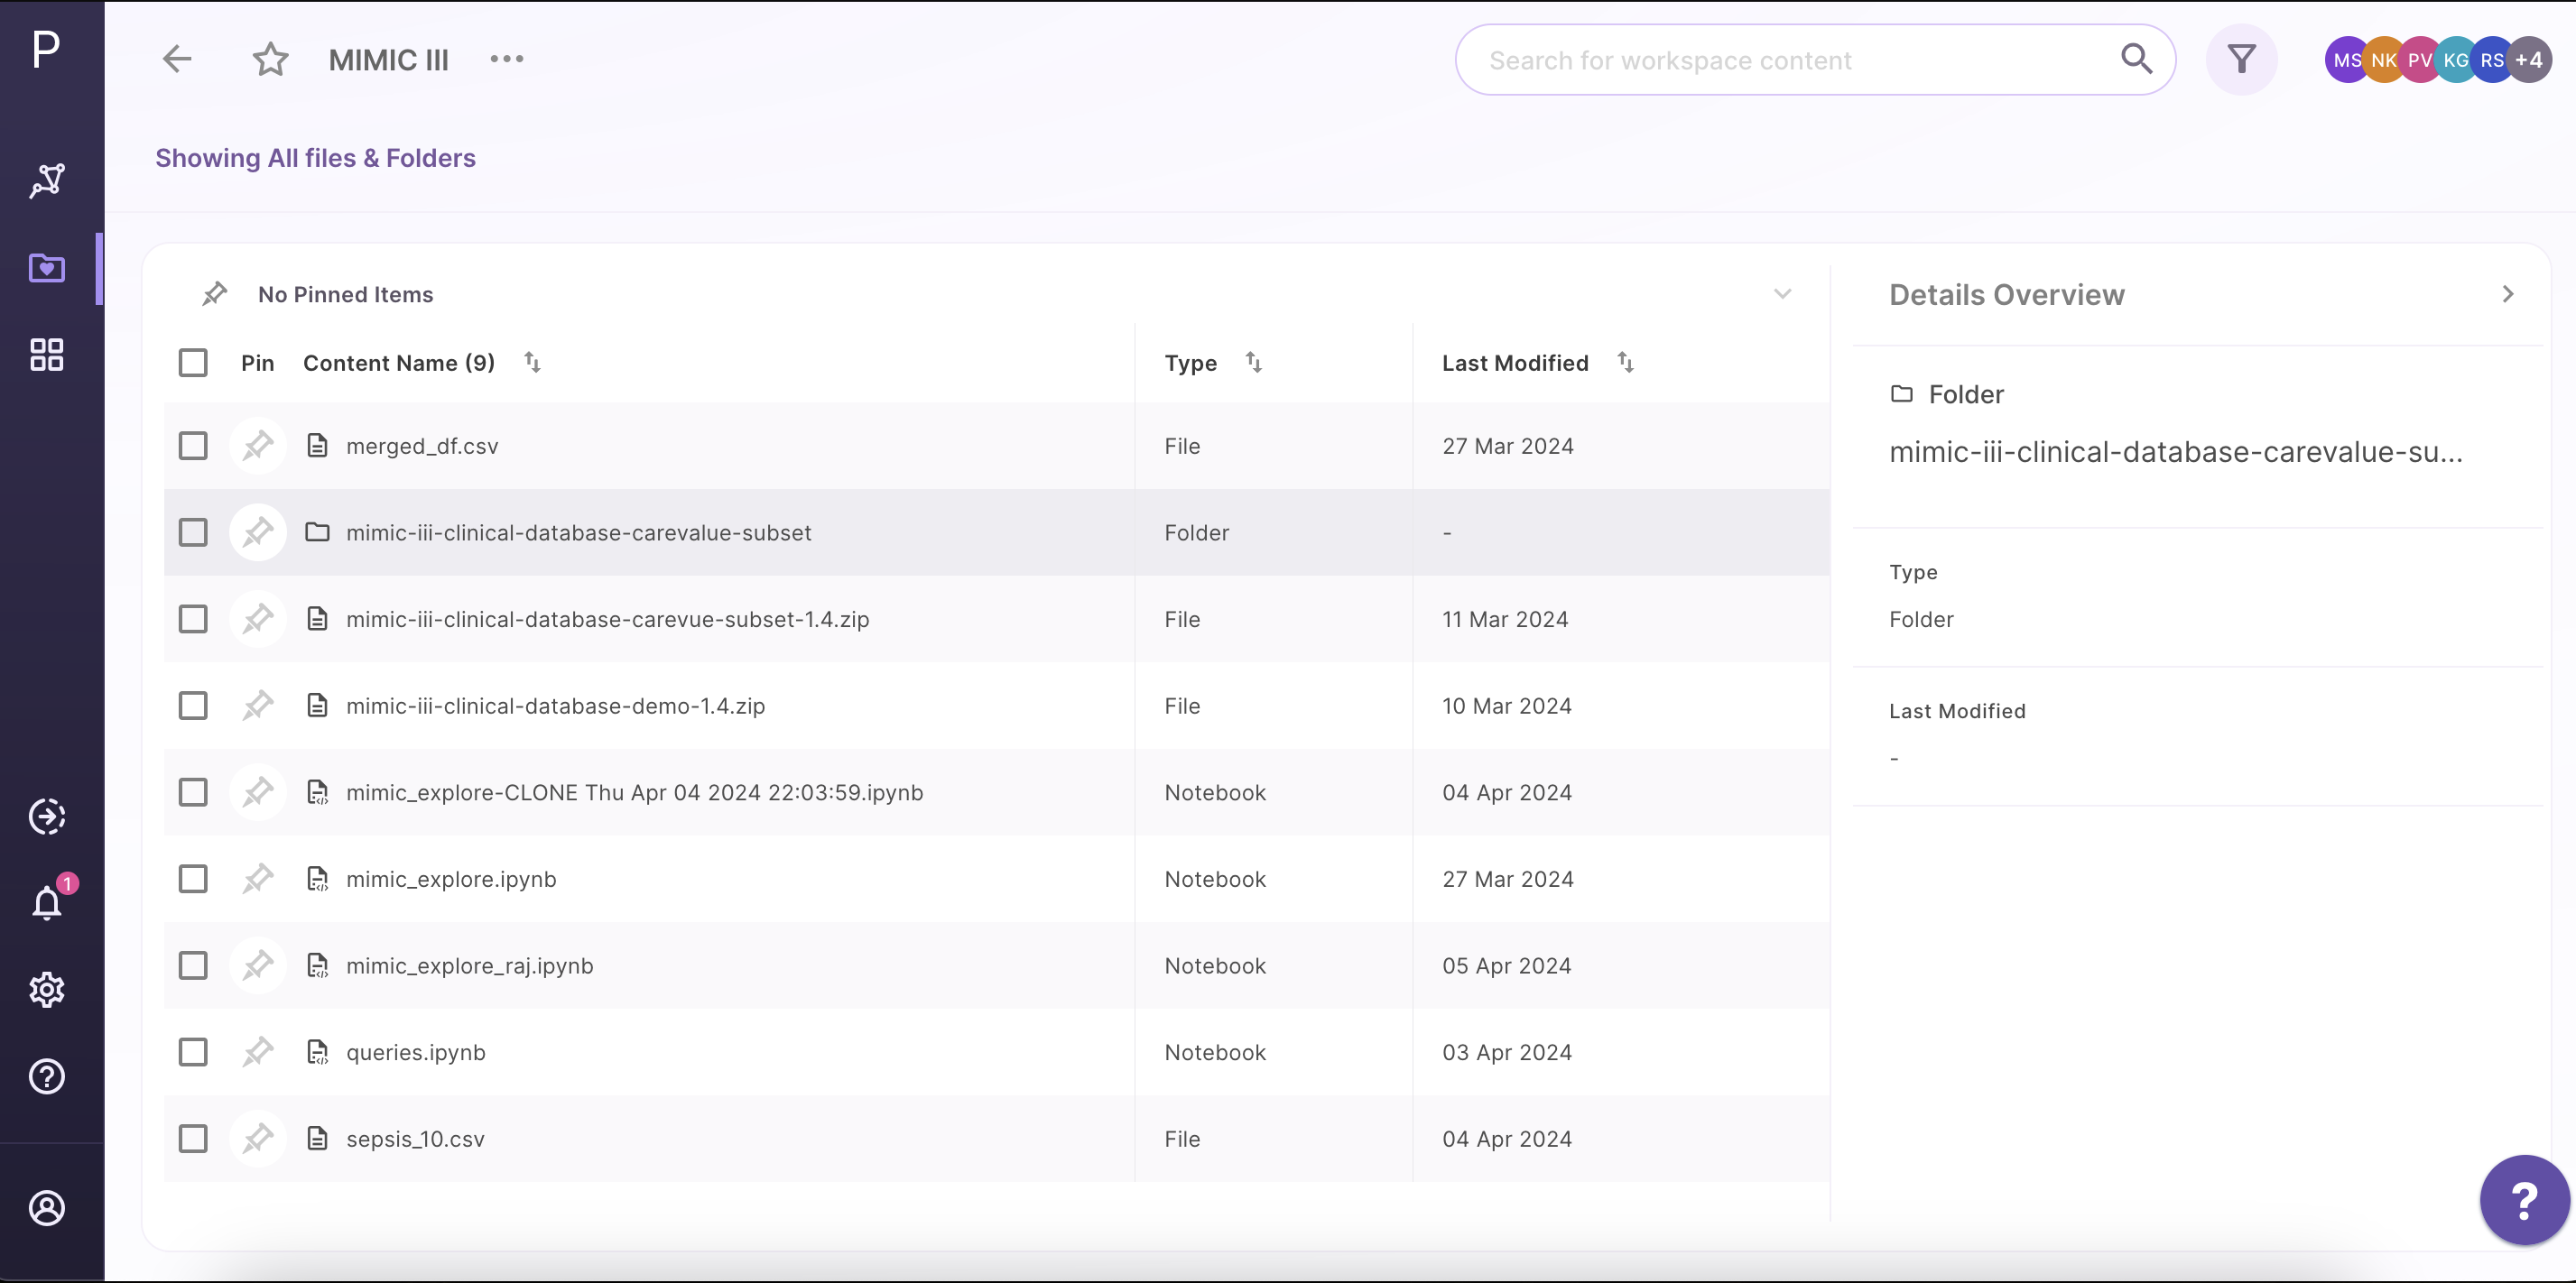
Figure 15. Folder Navigation
The purple section in the middle panel shows the path of the directory you are in. You can click on the name of any folder within the path to select the folder you want to browse to.
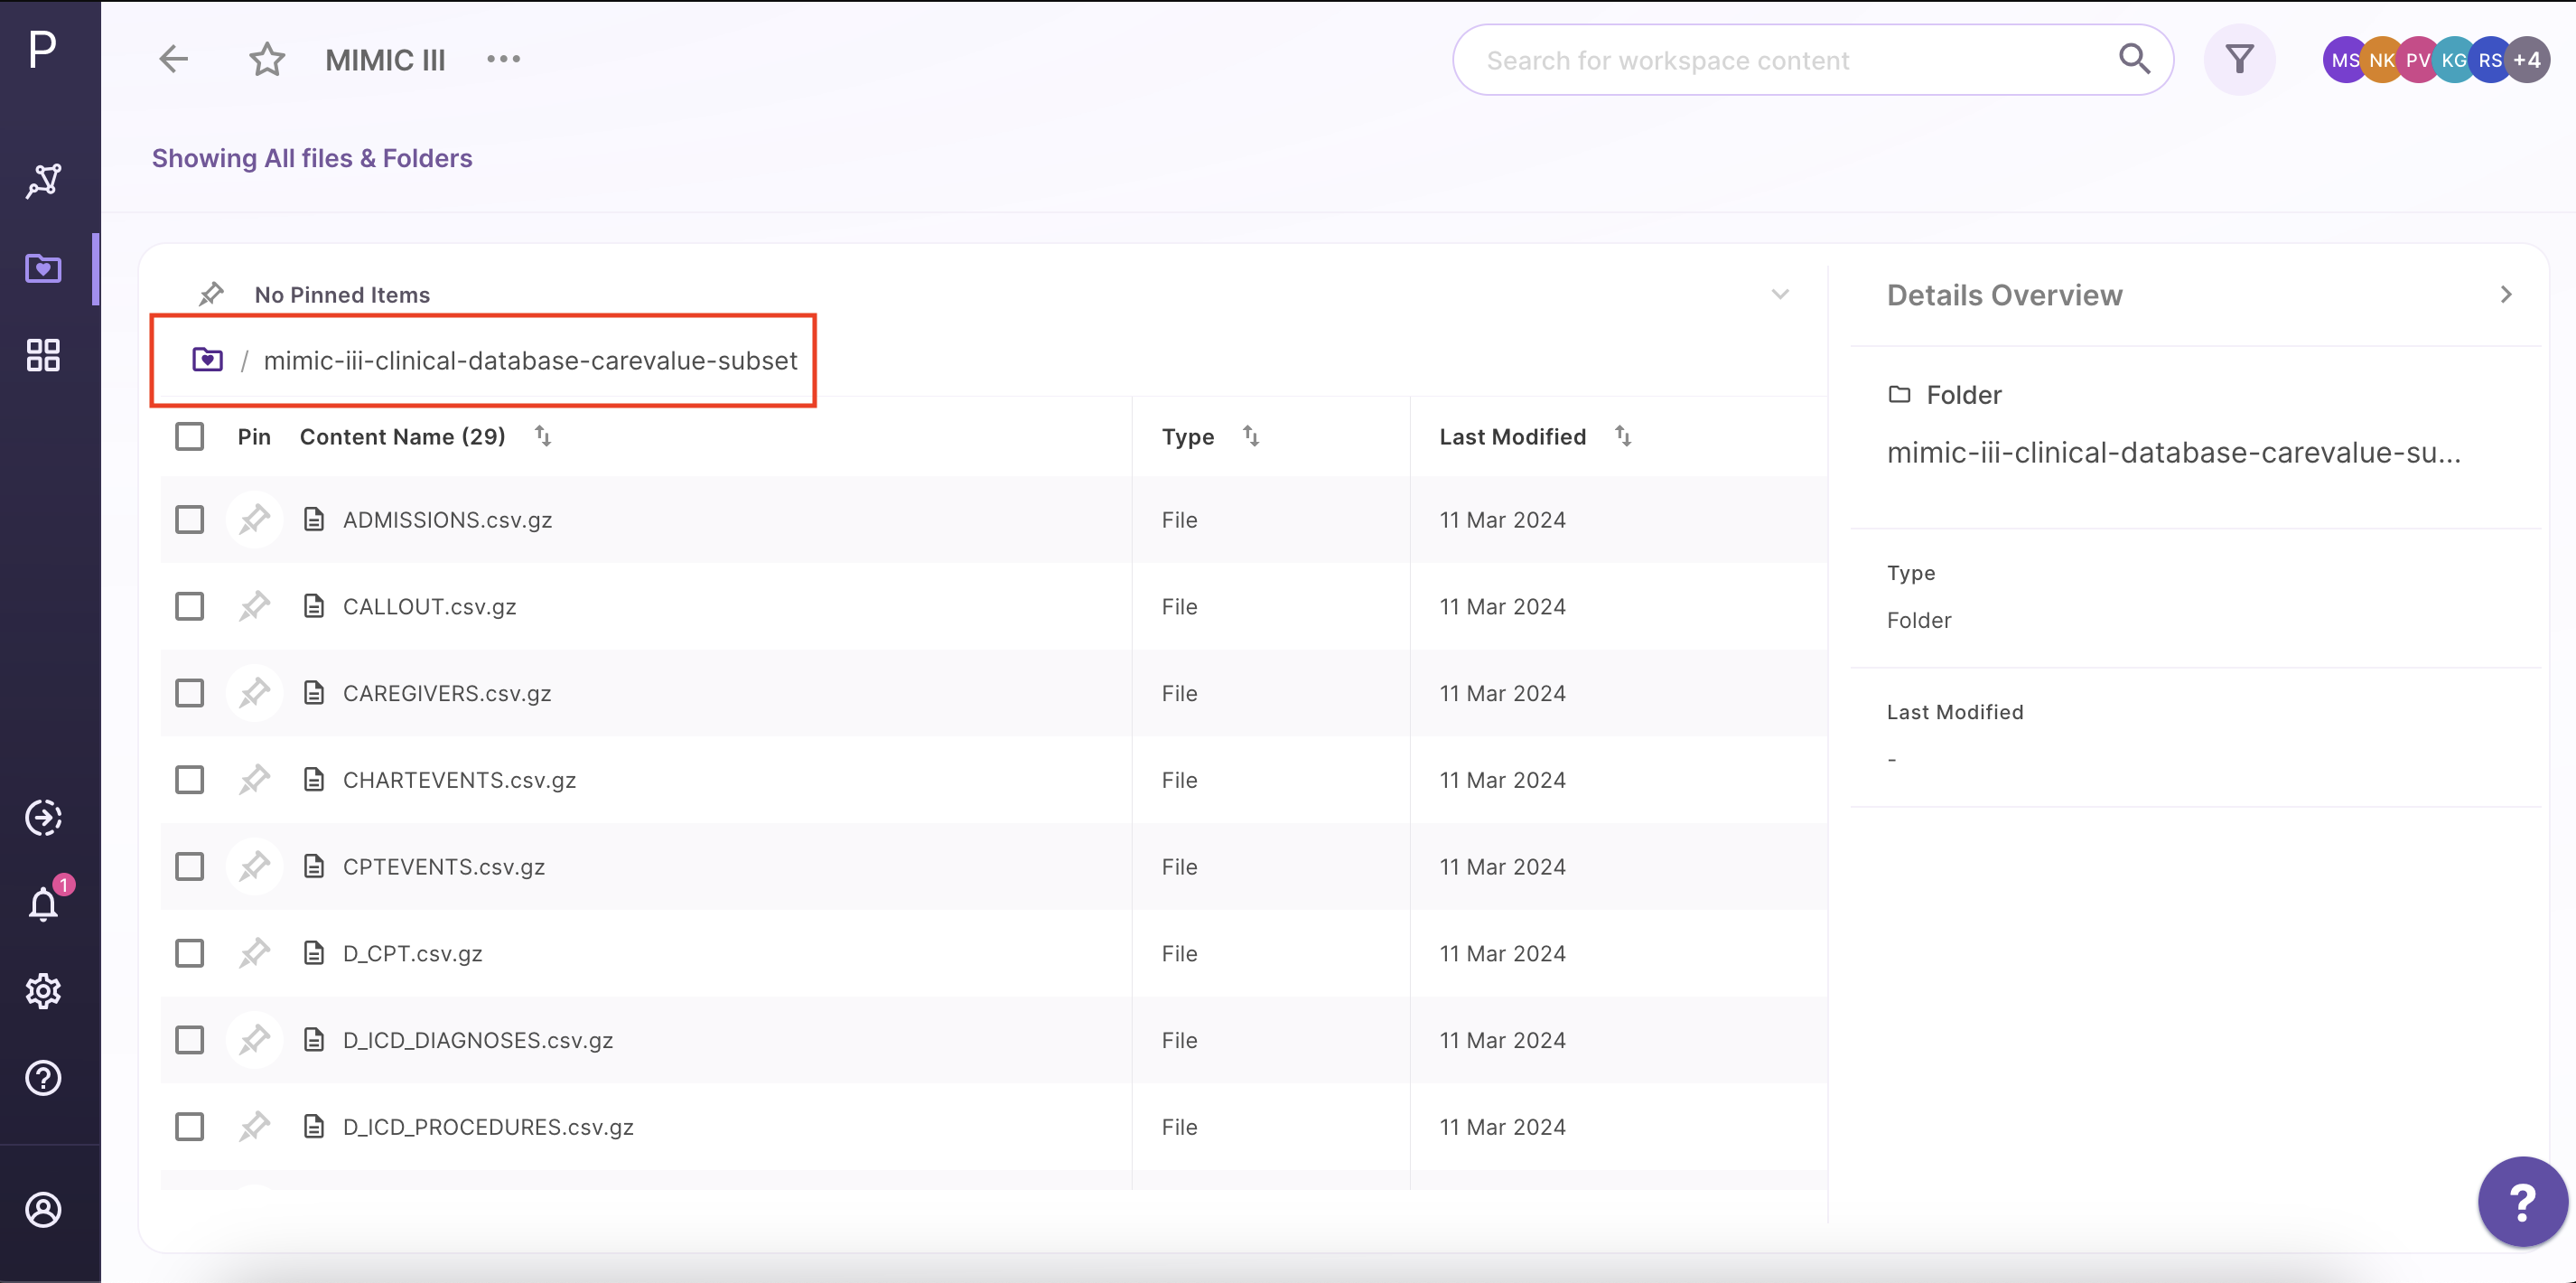
Figure 16. Folder Navigation Path
Editing your workspace
The menu beside the workspace name shows the menu items to edit your workspace details.
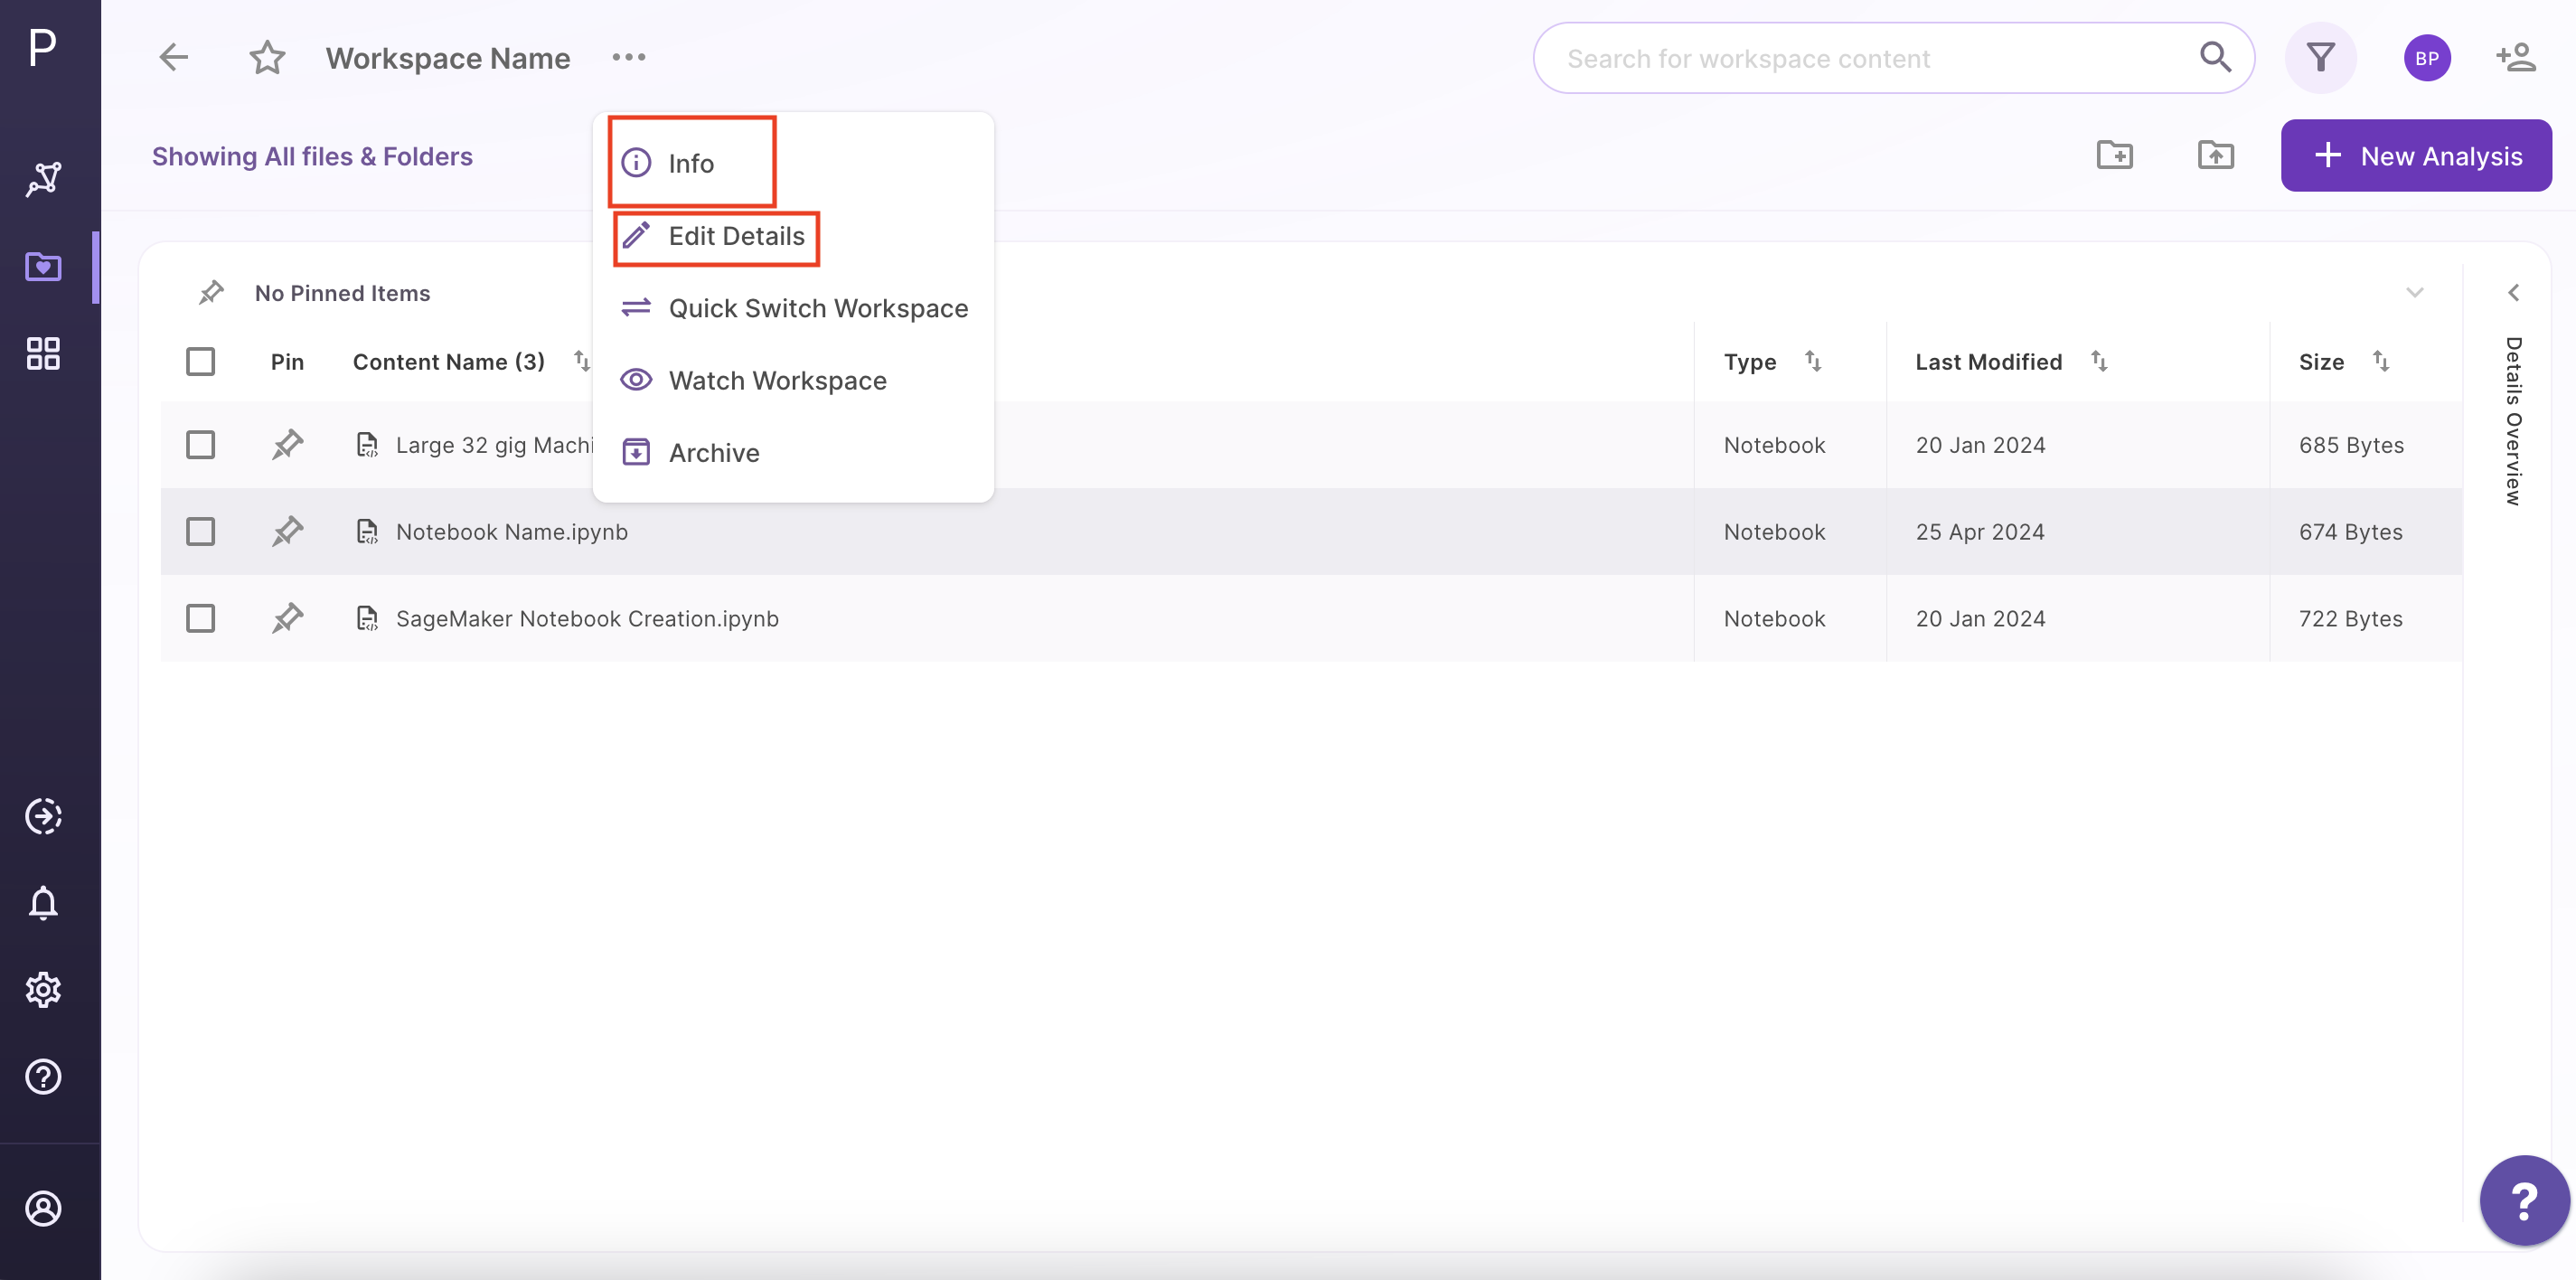
Figure 17. Workspace Edit option
Select Edit Details within the menu. Rename the workspace and/or change the description of the workspace and click on save changes or Click X to close the tab without saving any changes.
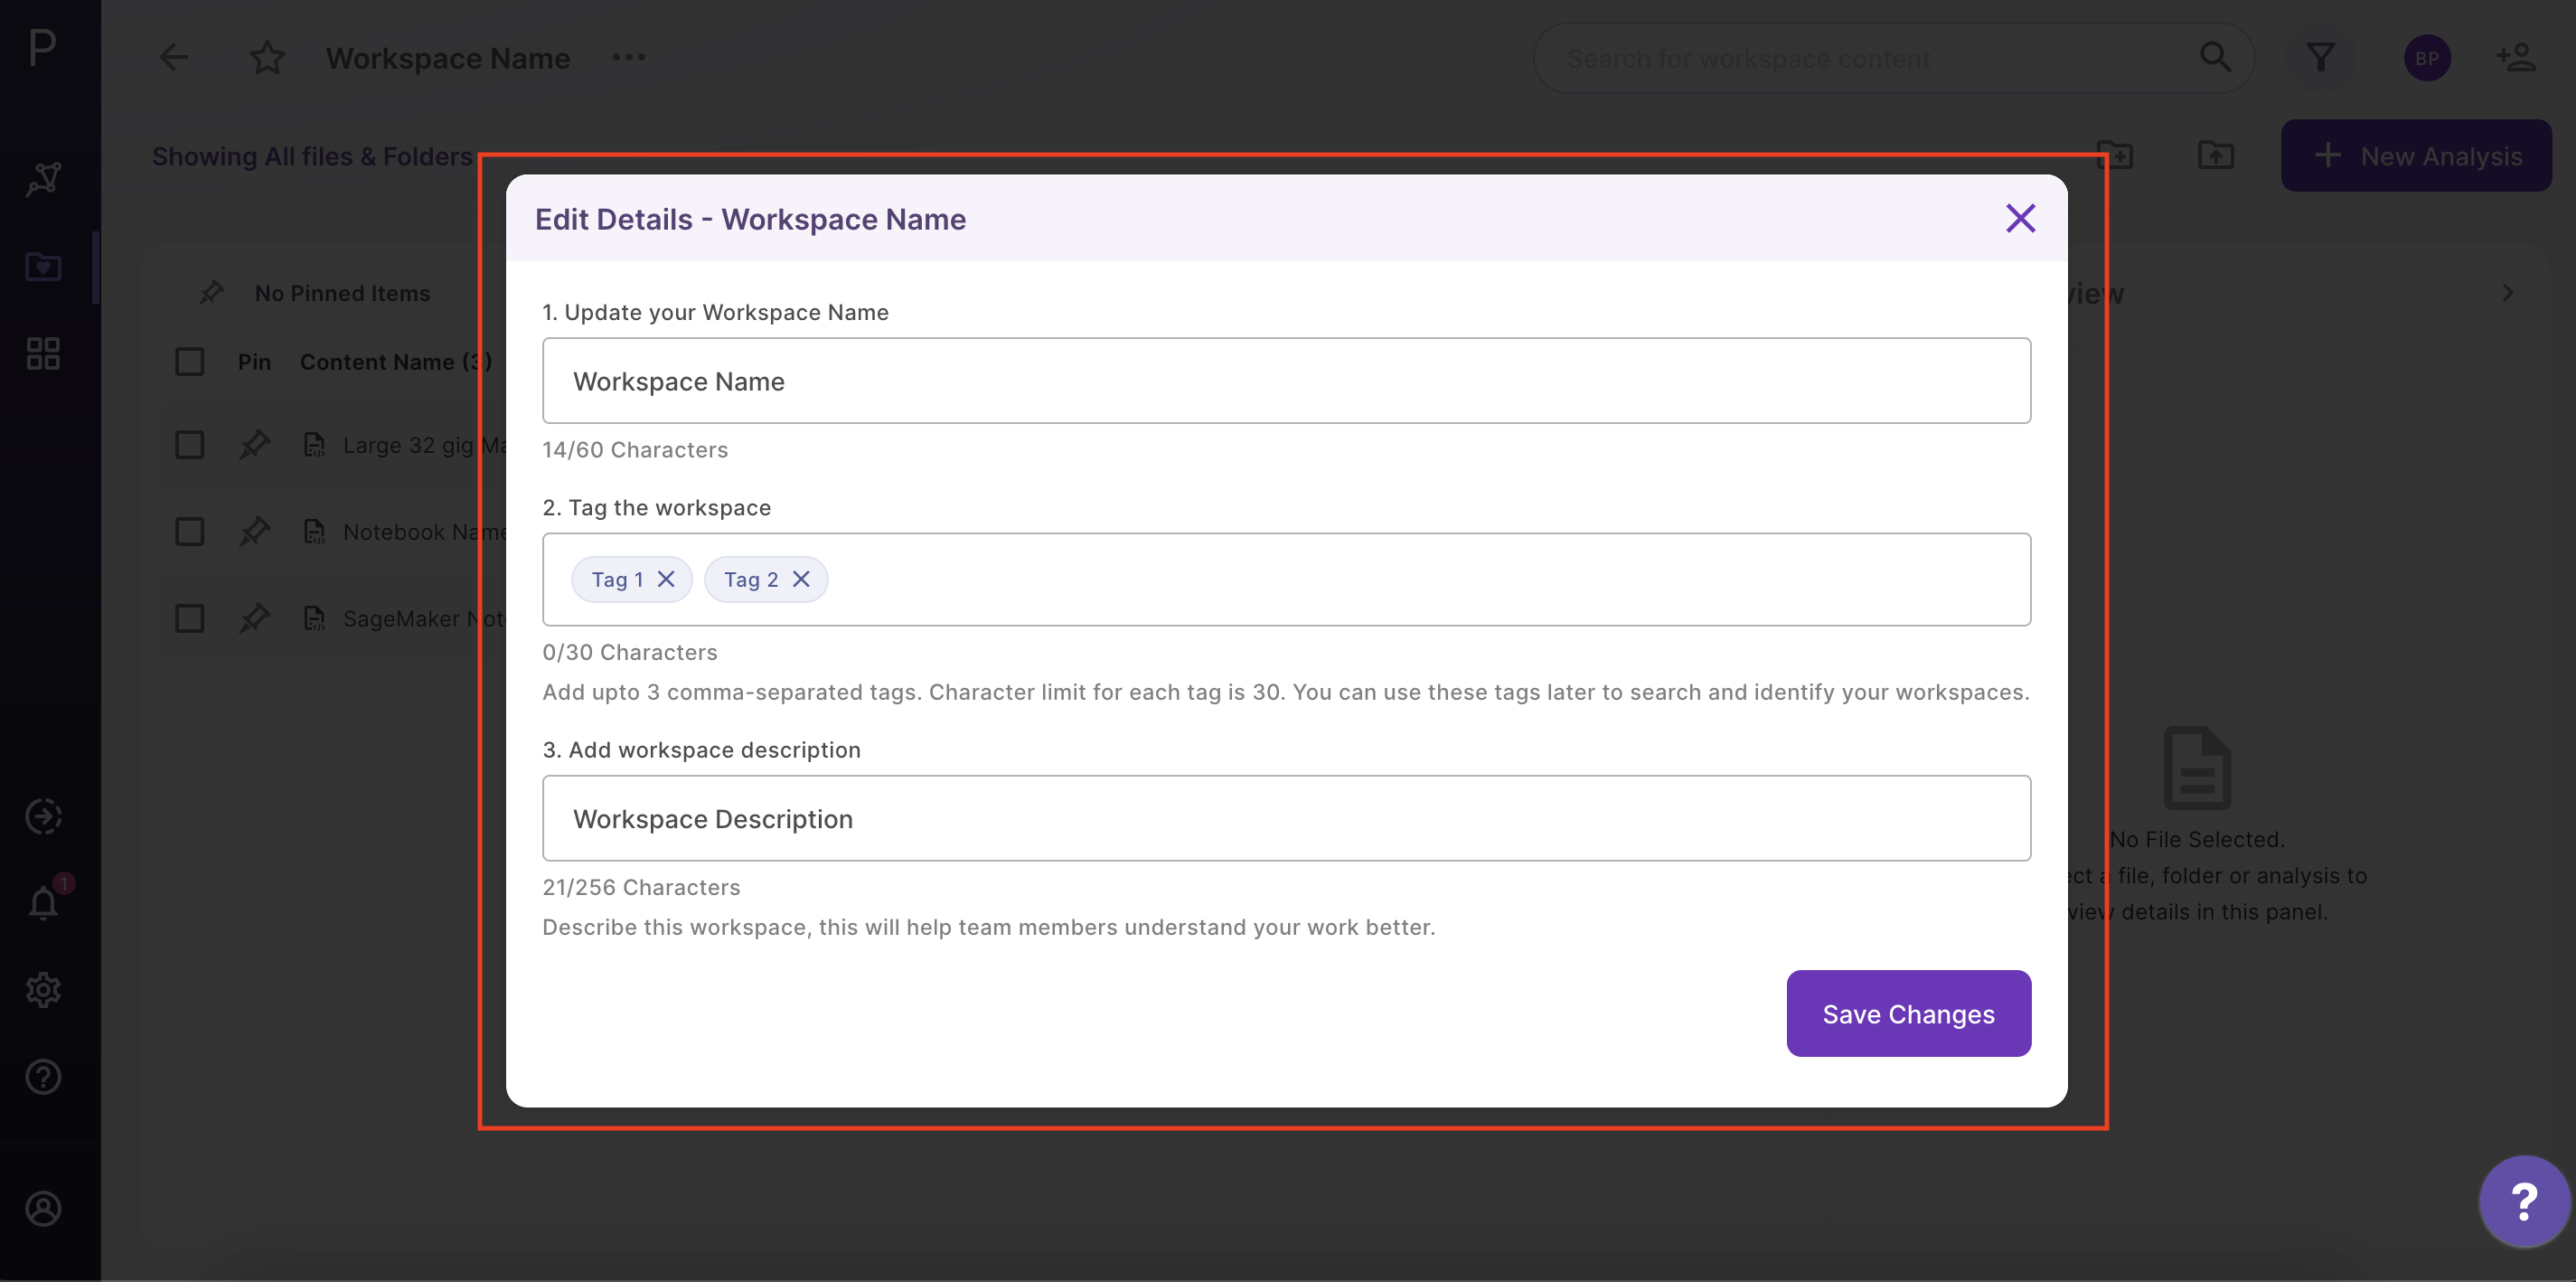
Figure 18. Workspace Edit Update
Users can edit name, add tags and description to a workspace.
Archival of Workspace
Having unused Workspaces result in unnecessary clutter, inefficiency in looking up things and excess storage costs. Users can hence “Archive” Workspace/s from the list of Workspaces they’ve been working on or no longer need.
The “Archive” Option appears in the Menu beside Workspace Name
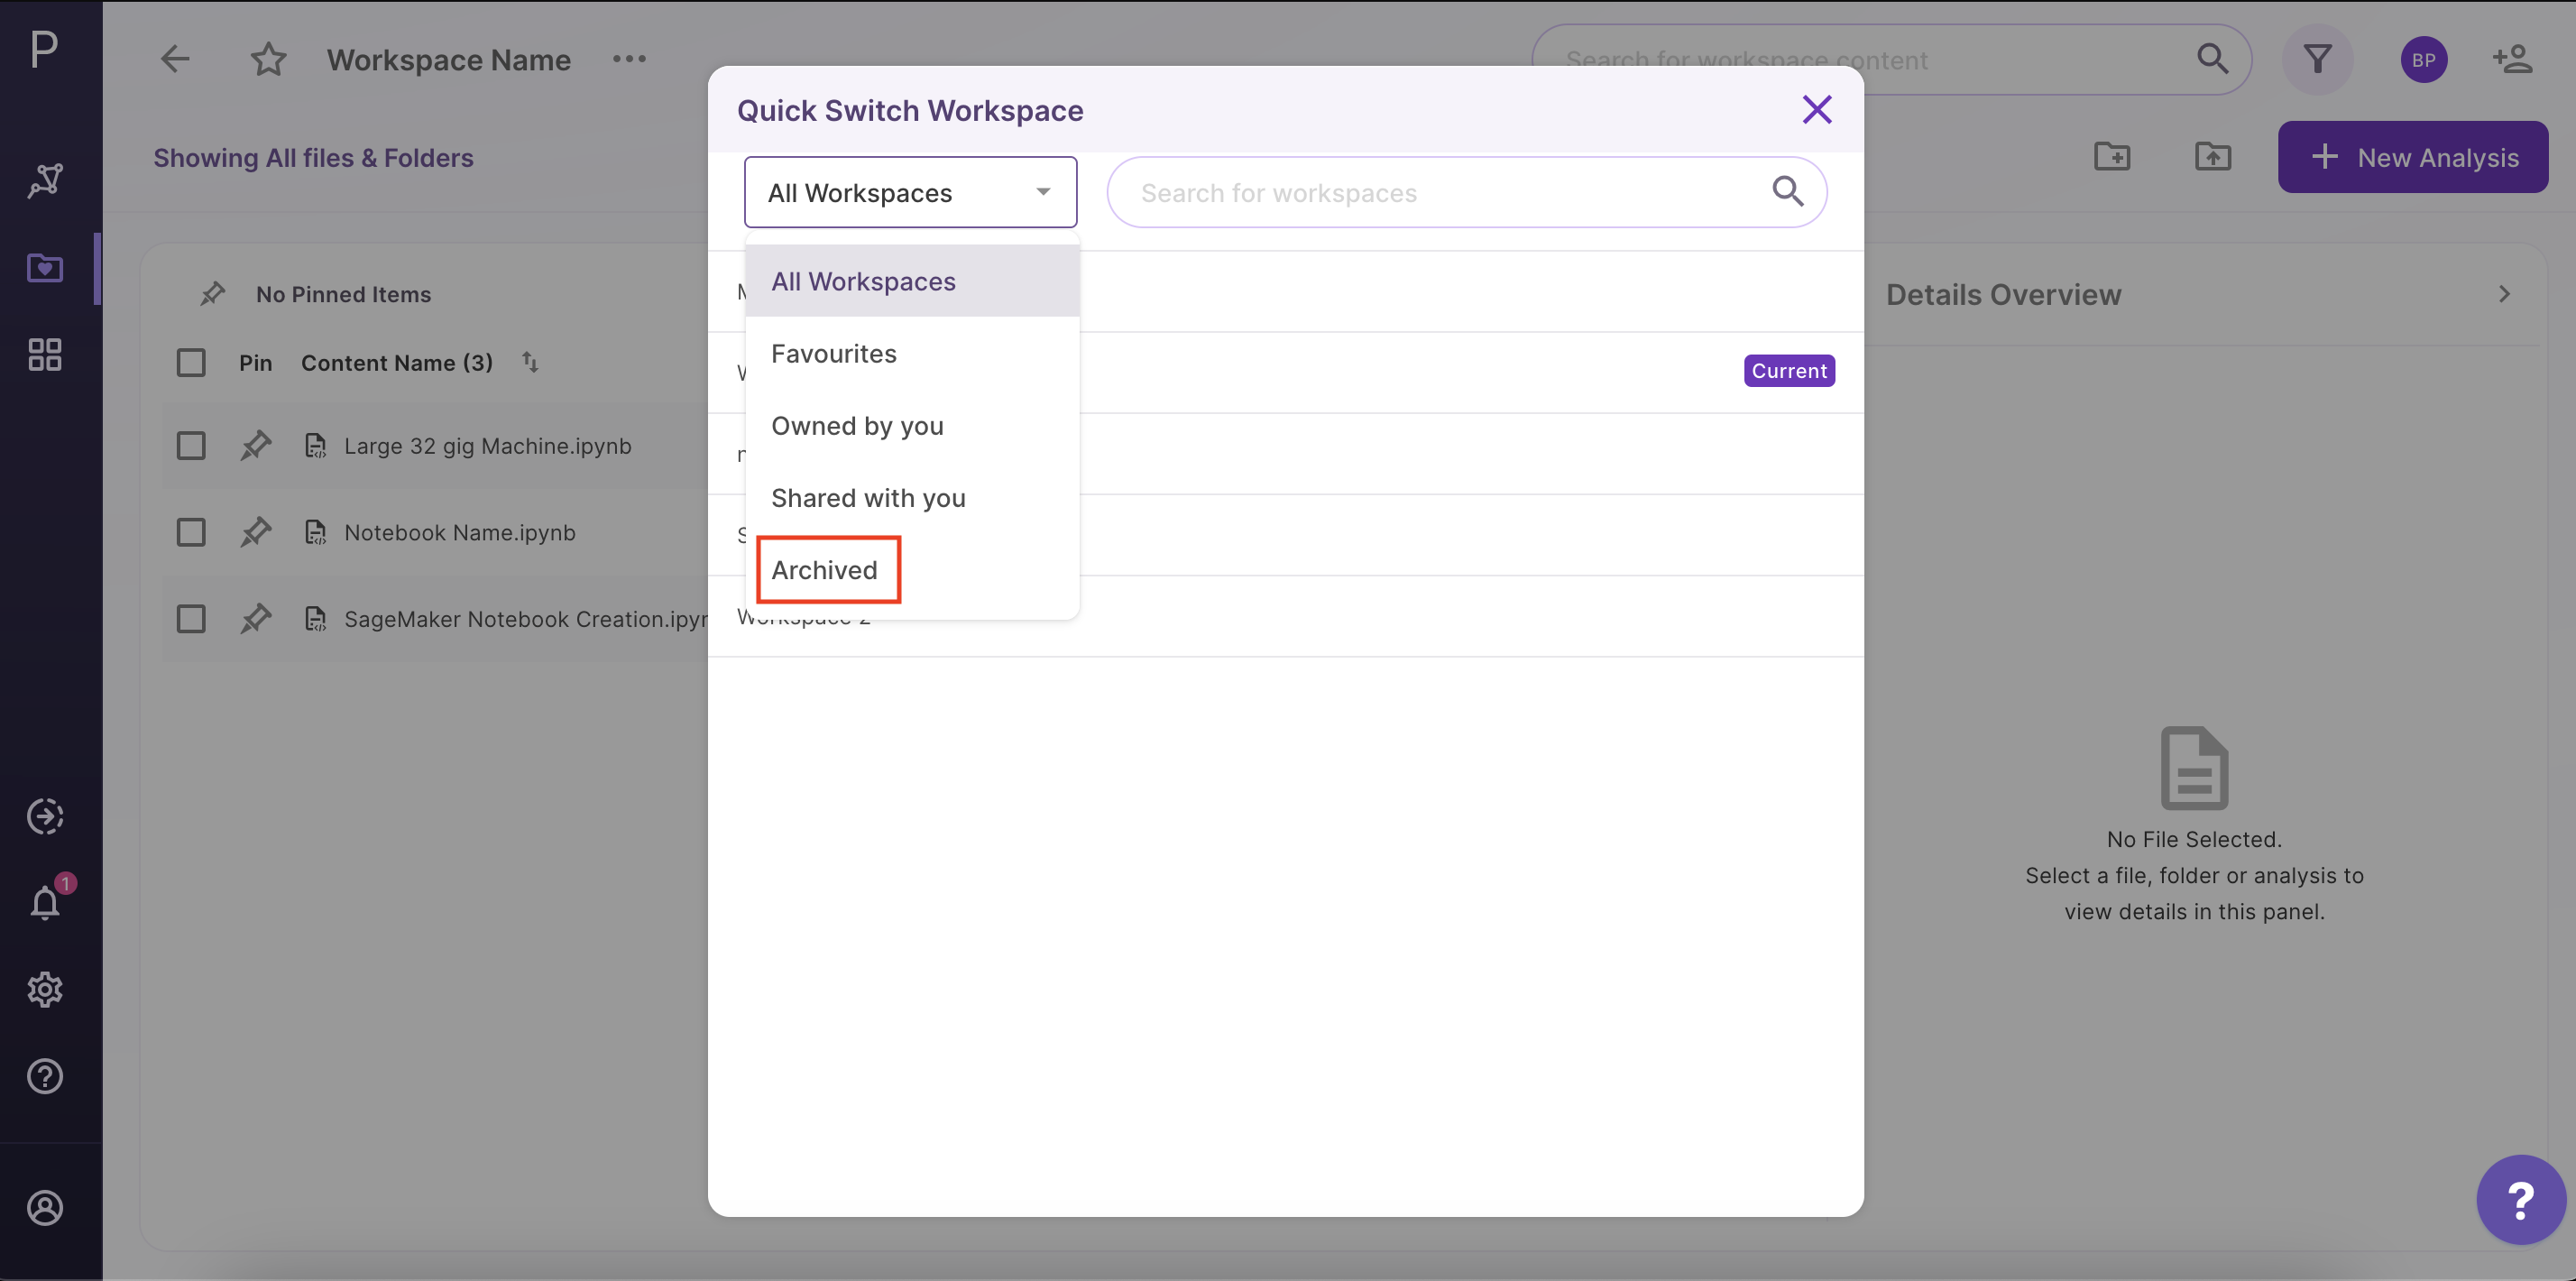
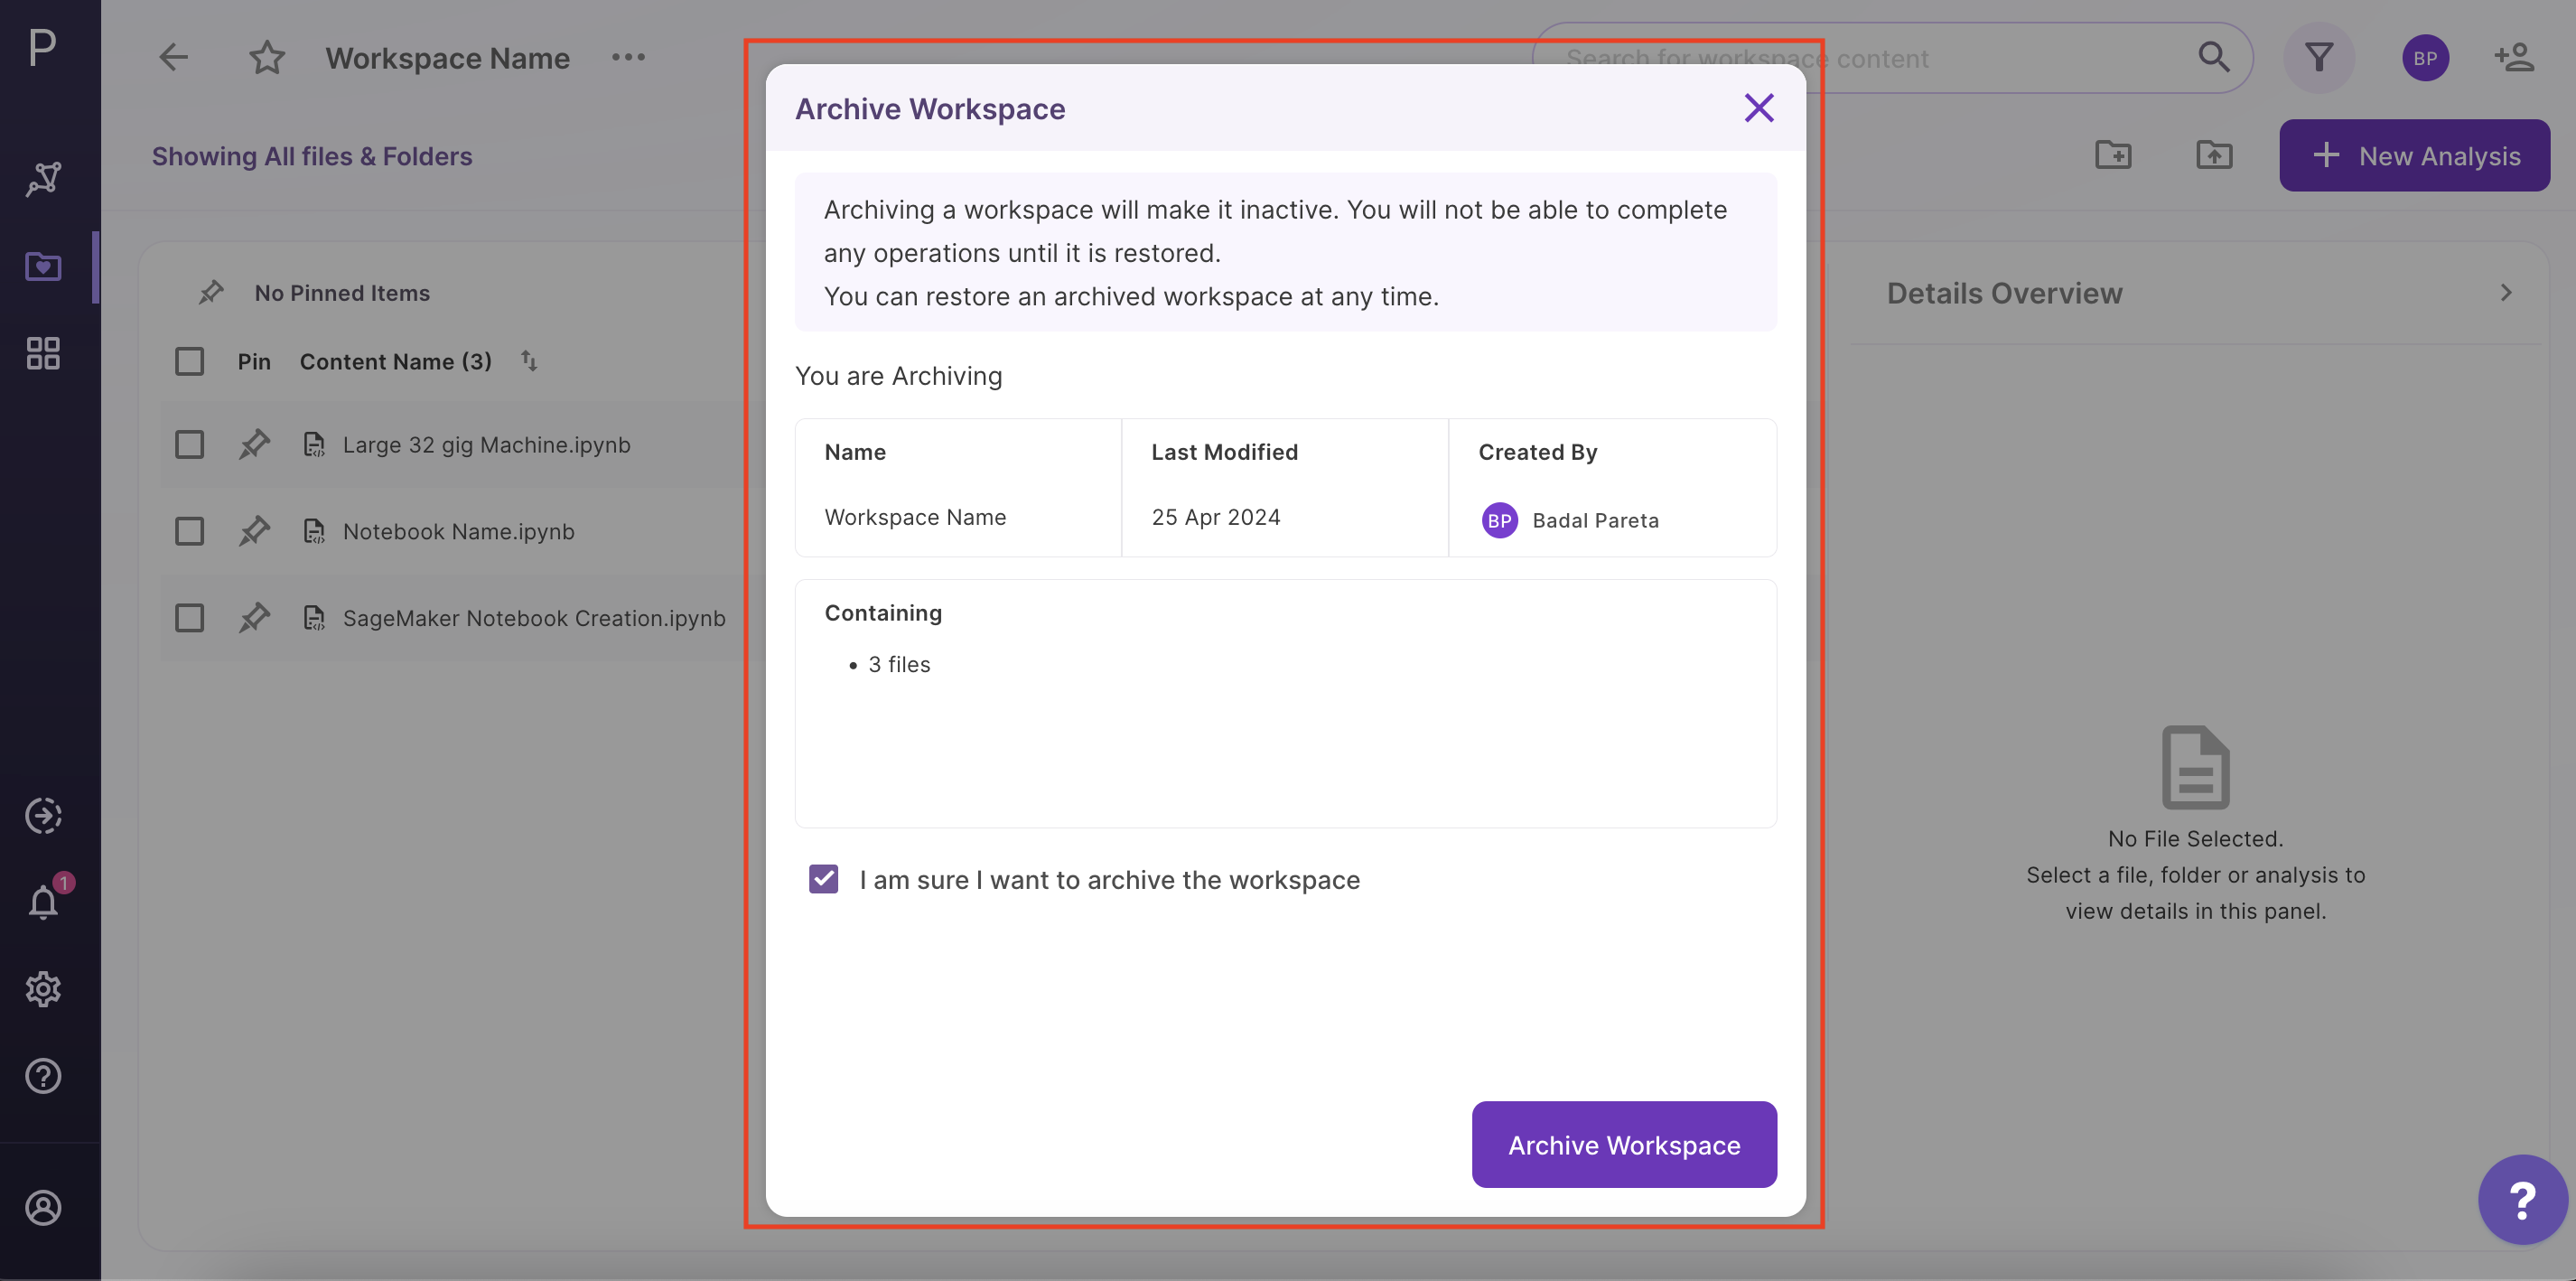
Figure 20. Archiving a Workspace
- The archived workspaces are not deleted permanently. They can either be restored or deleted permanently at any point in time.
- The archived workspaces do not appear on the ‘Search’ results page.
- It will consist of all files & folders from the Active Workspace.The users can view the list of ‘Active’ and ‘Archived’ Workspaces and can also switch between them.
Switching Between Active And Archived Workspaces
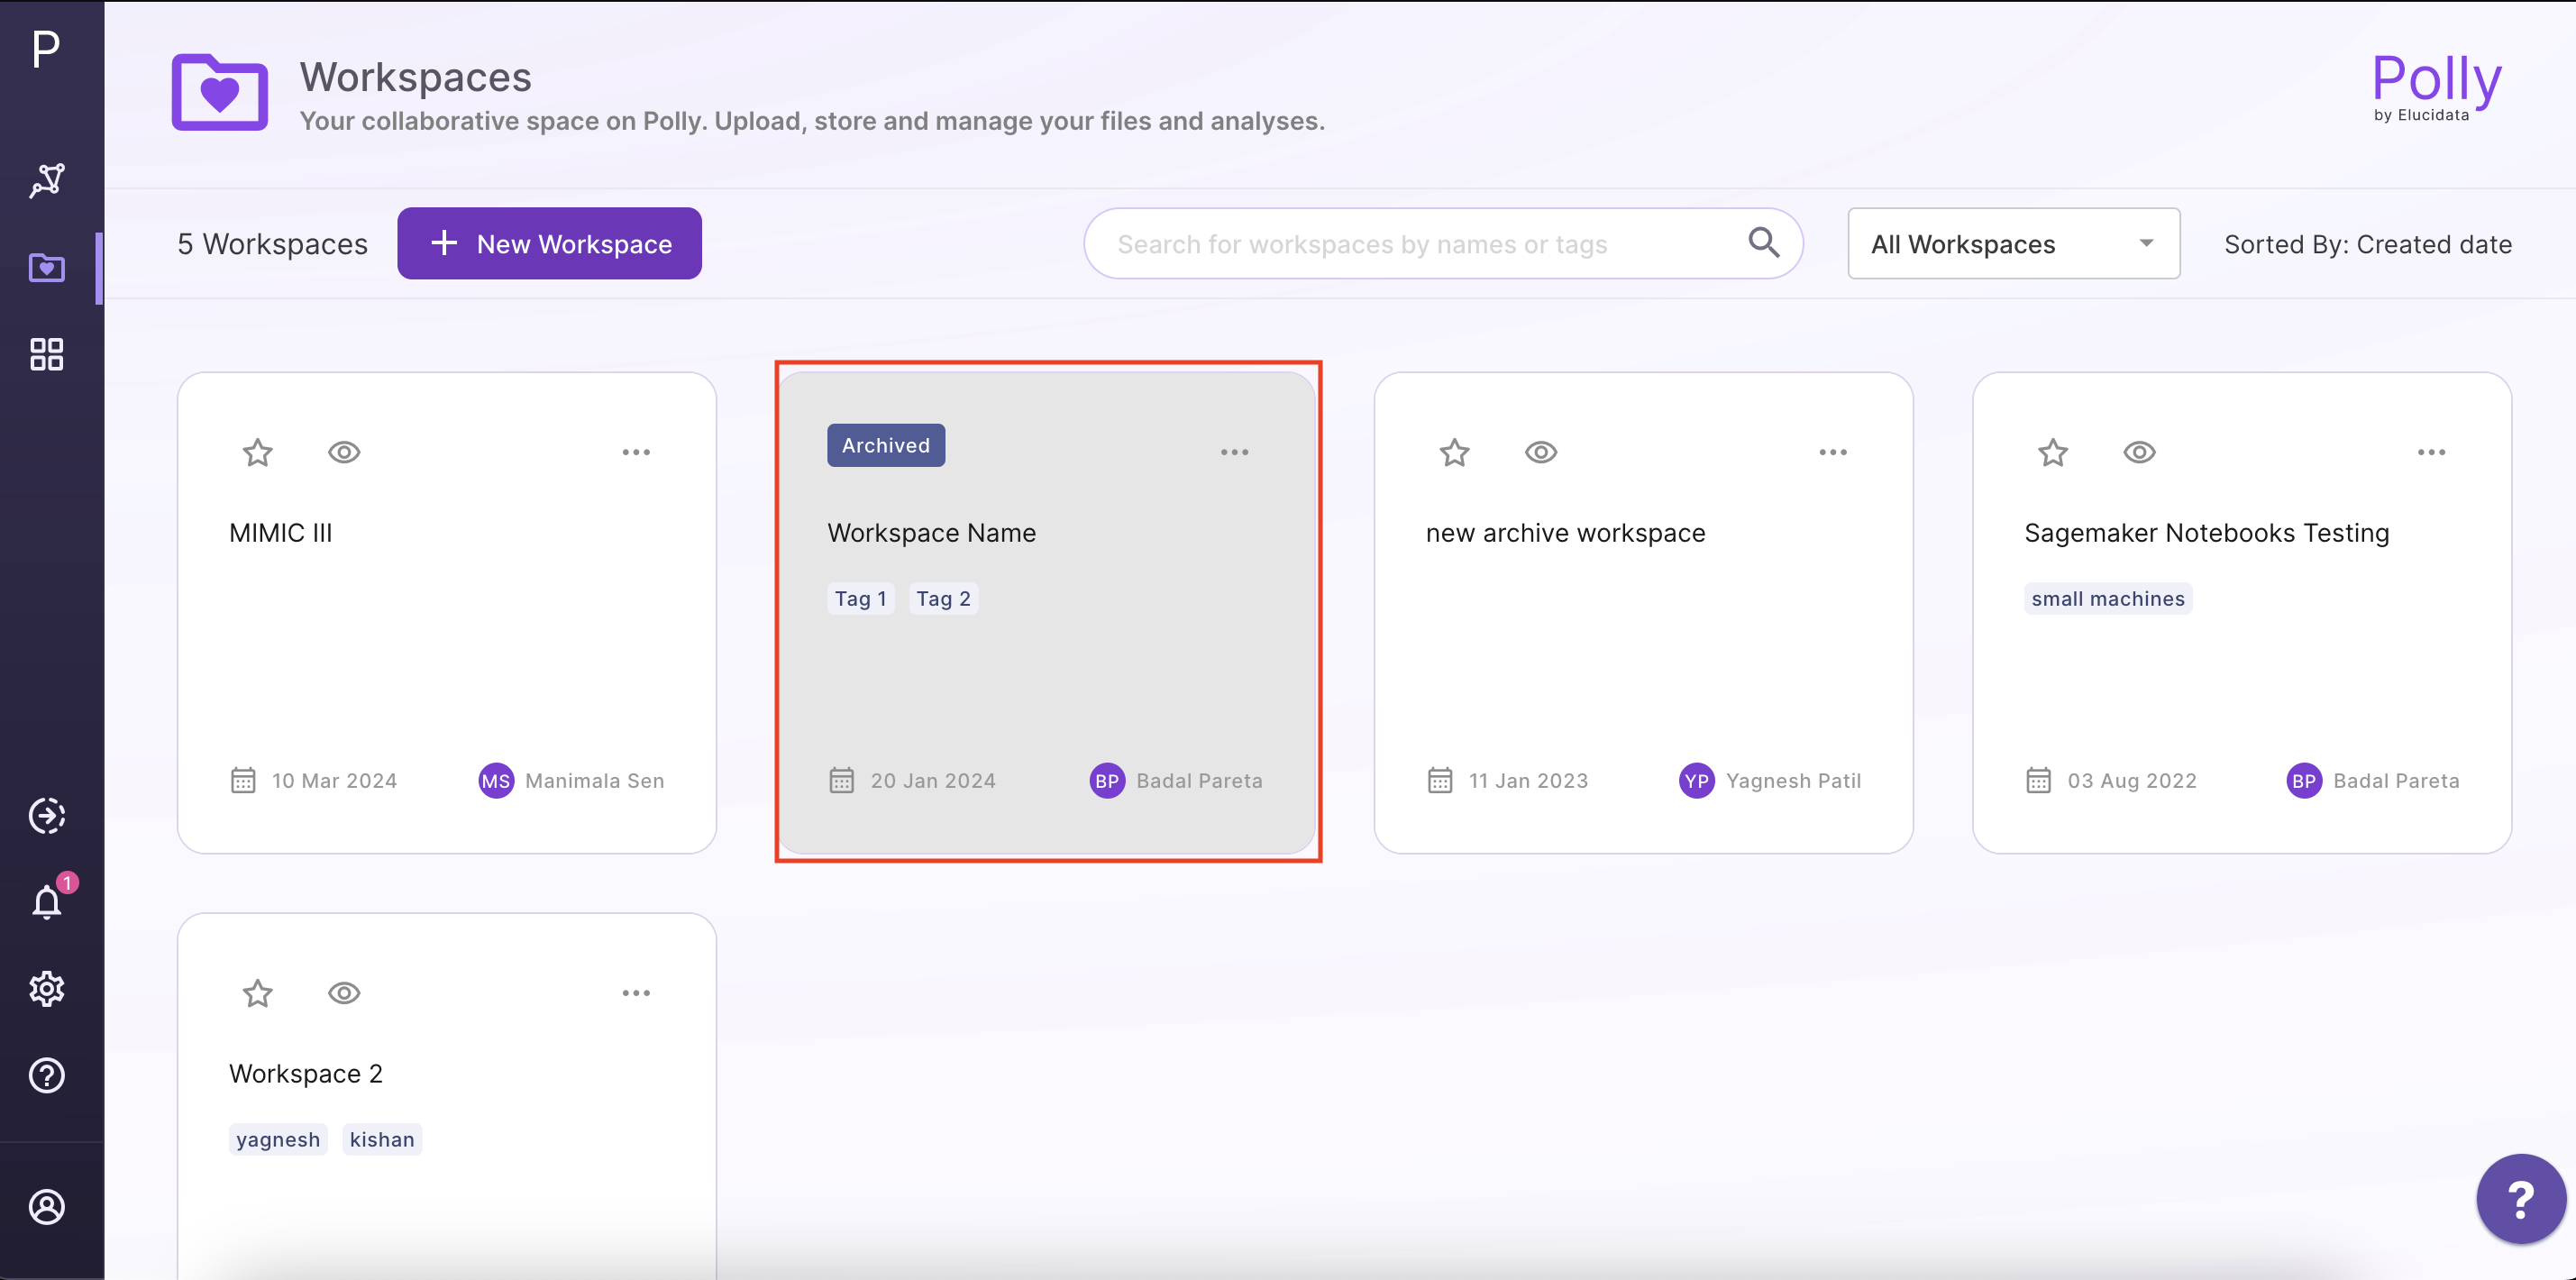
User can view the archived and active workspaces on the Home pagea and can switch between their Active and Archived Workspaces at any point in time.
Restoring Archived Workspaces
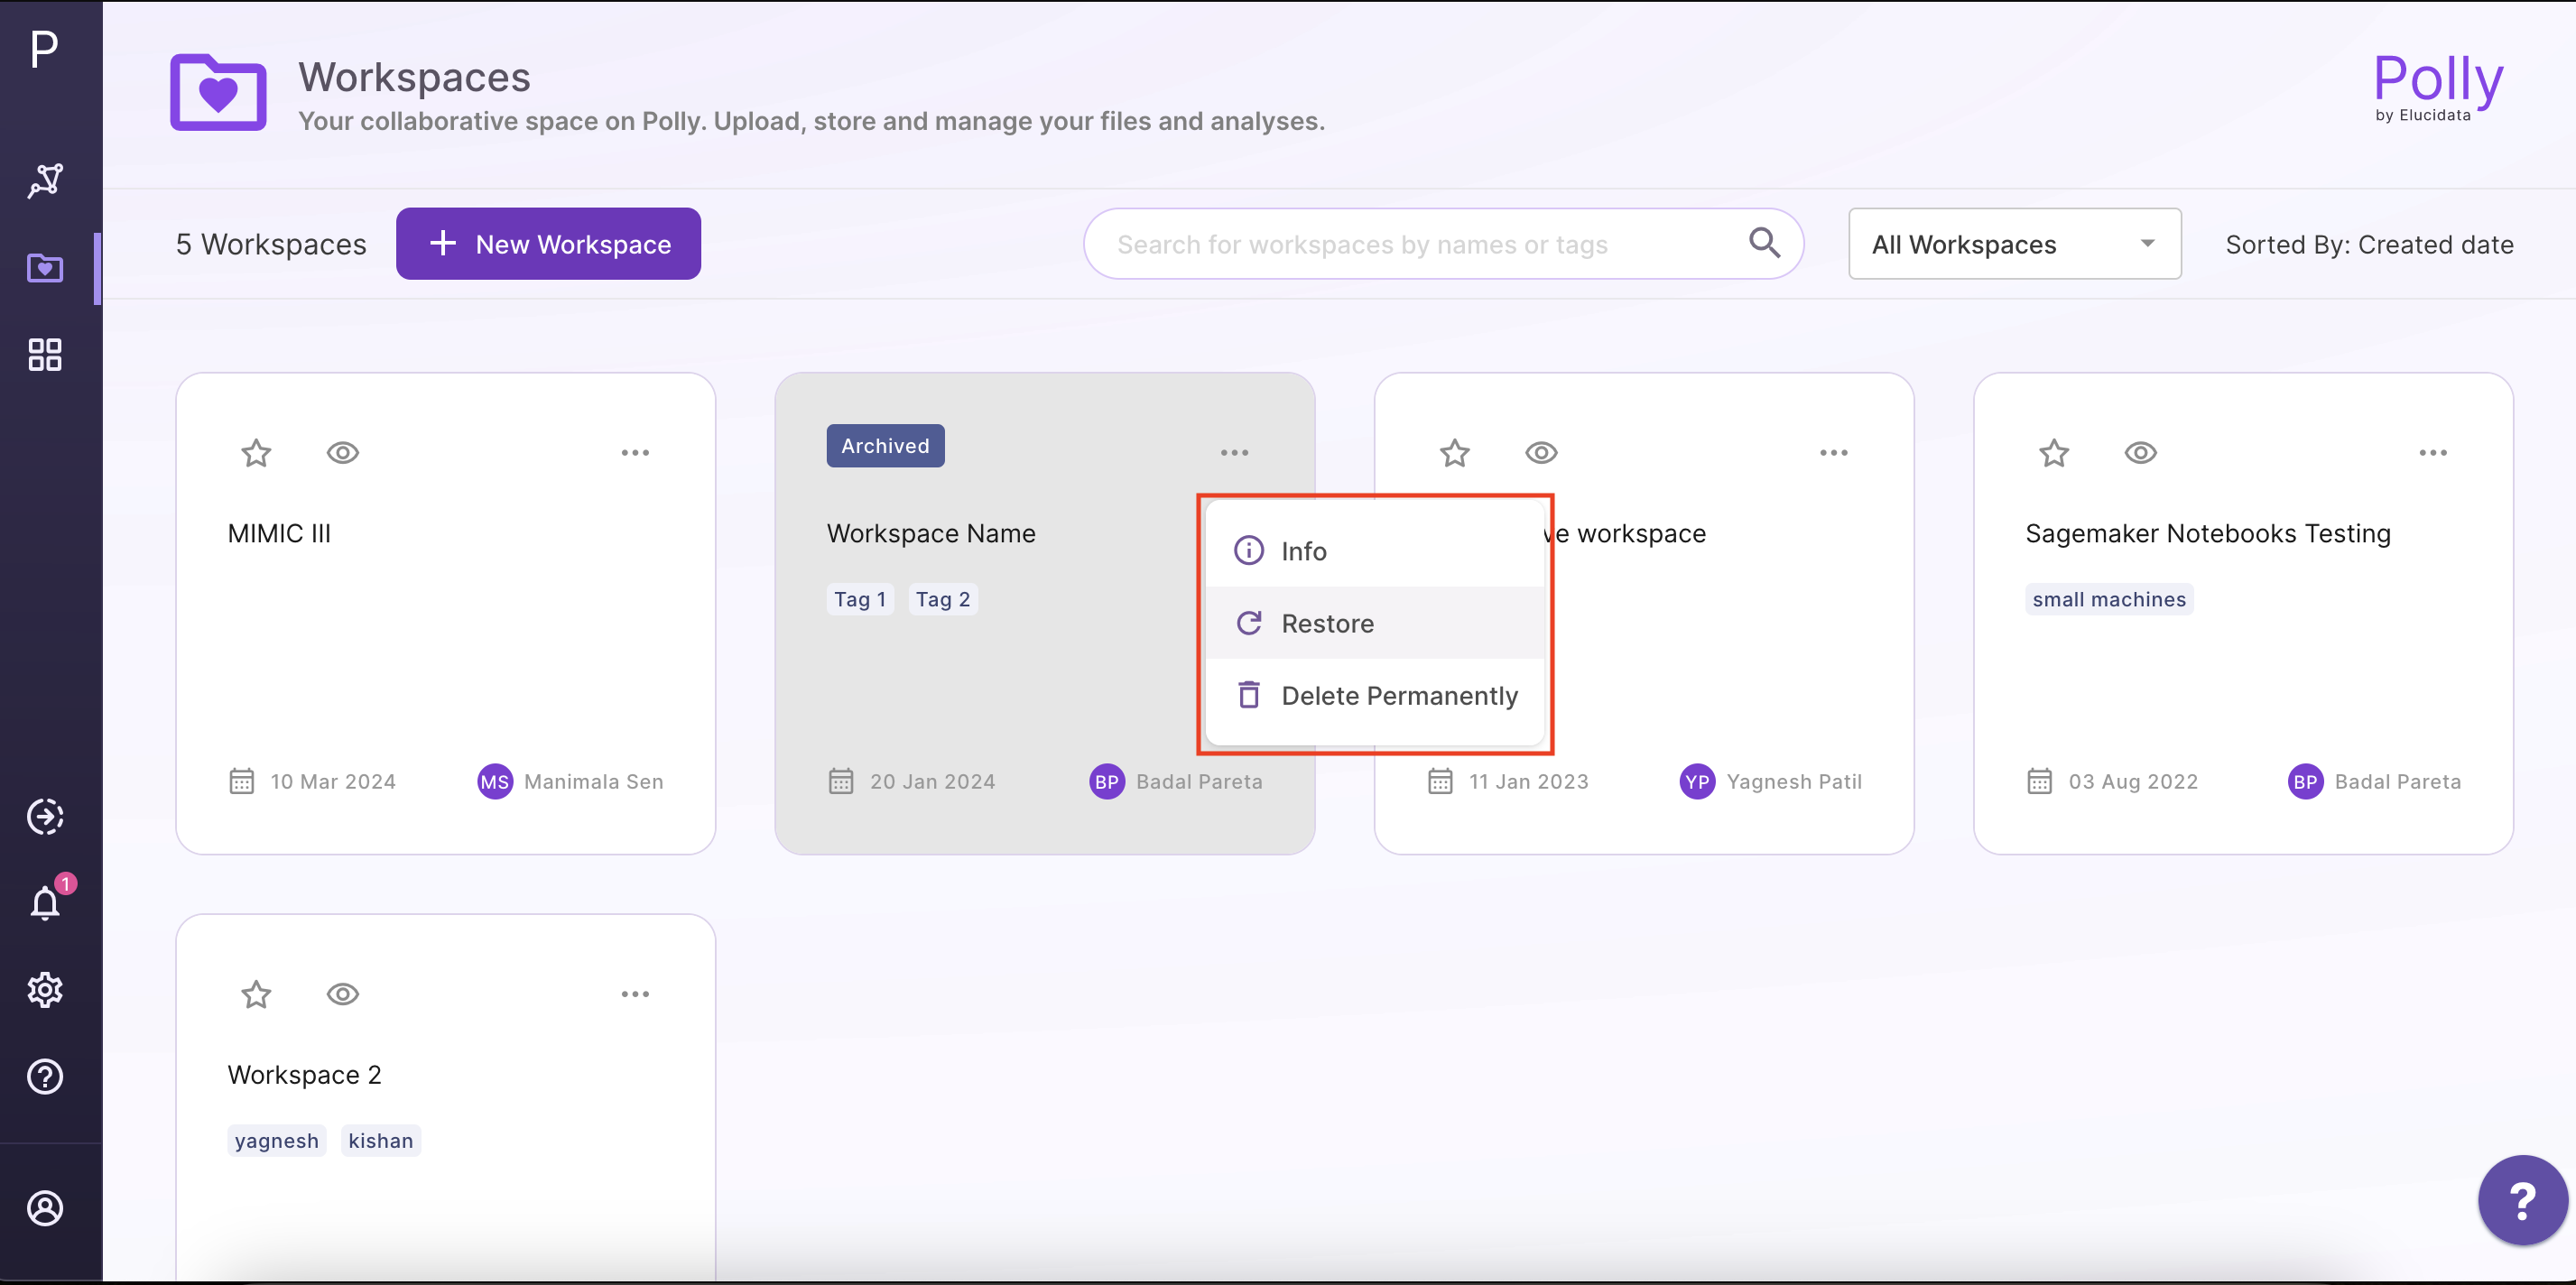
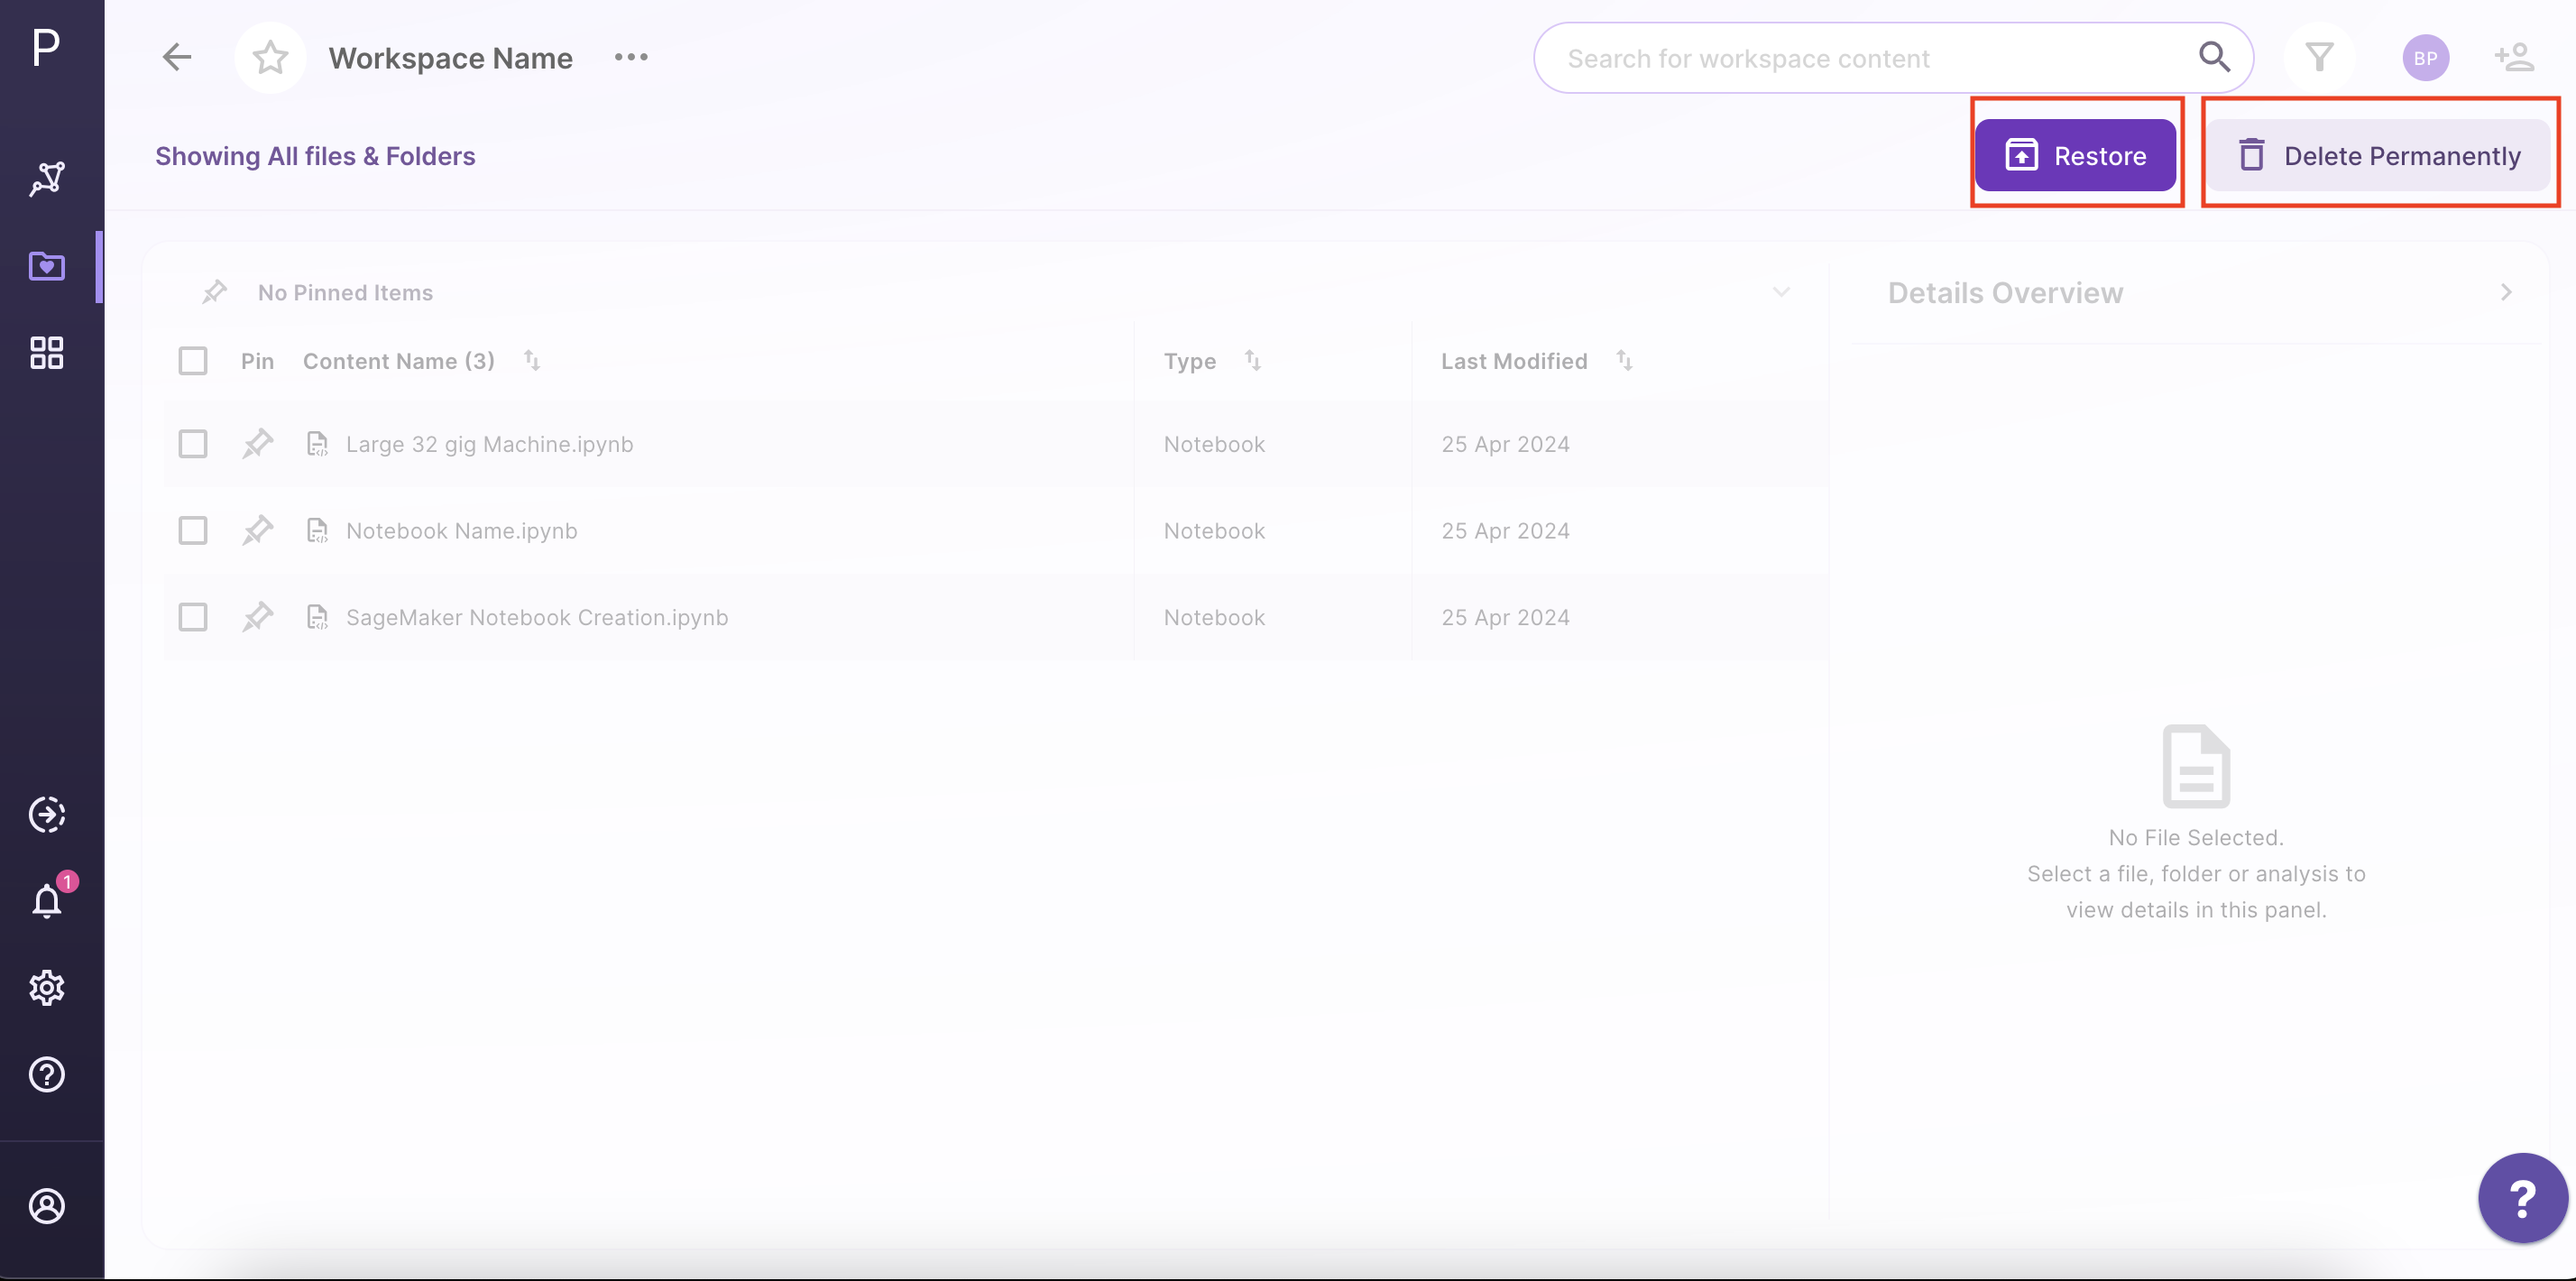
Figure 21. Restoring archived Workspaces
- Users can restore their Workspaces using the ‘Restore Workspace’ option.
- All docs/files/folders associated with the Workspace will be restored to an Active State.
- It will also restore access to all existing collaborators.
- Once a Workspace is restored, it is renamed to “OriginalWorkspaceName_Restored” to avoid confusion in case another Workspace with a similar name exists.
Deleting a Workspace Permanently
-
The users can delete a workspace permanently from their Archived section only.
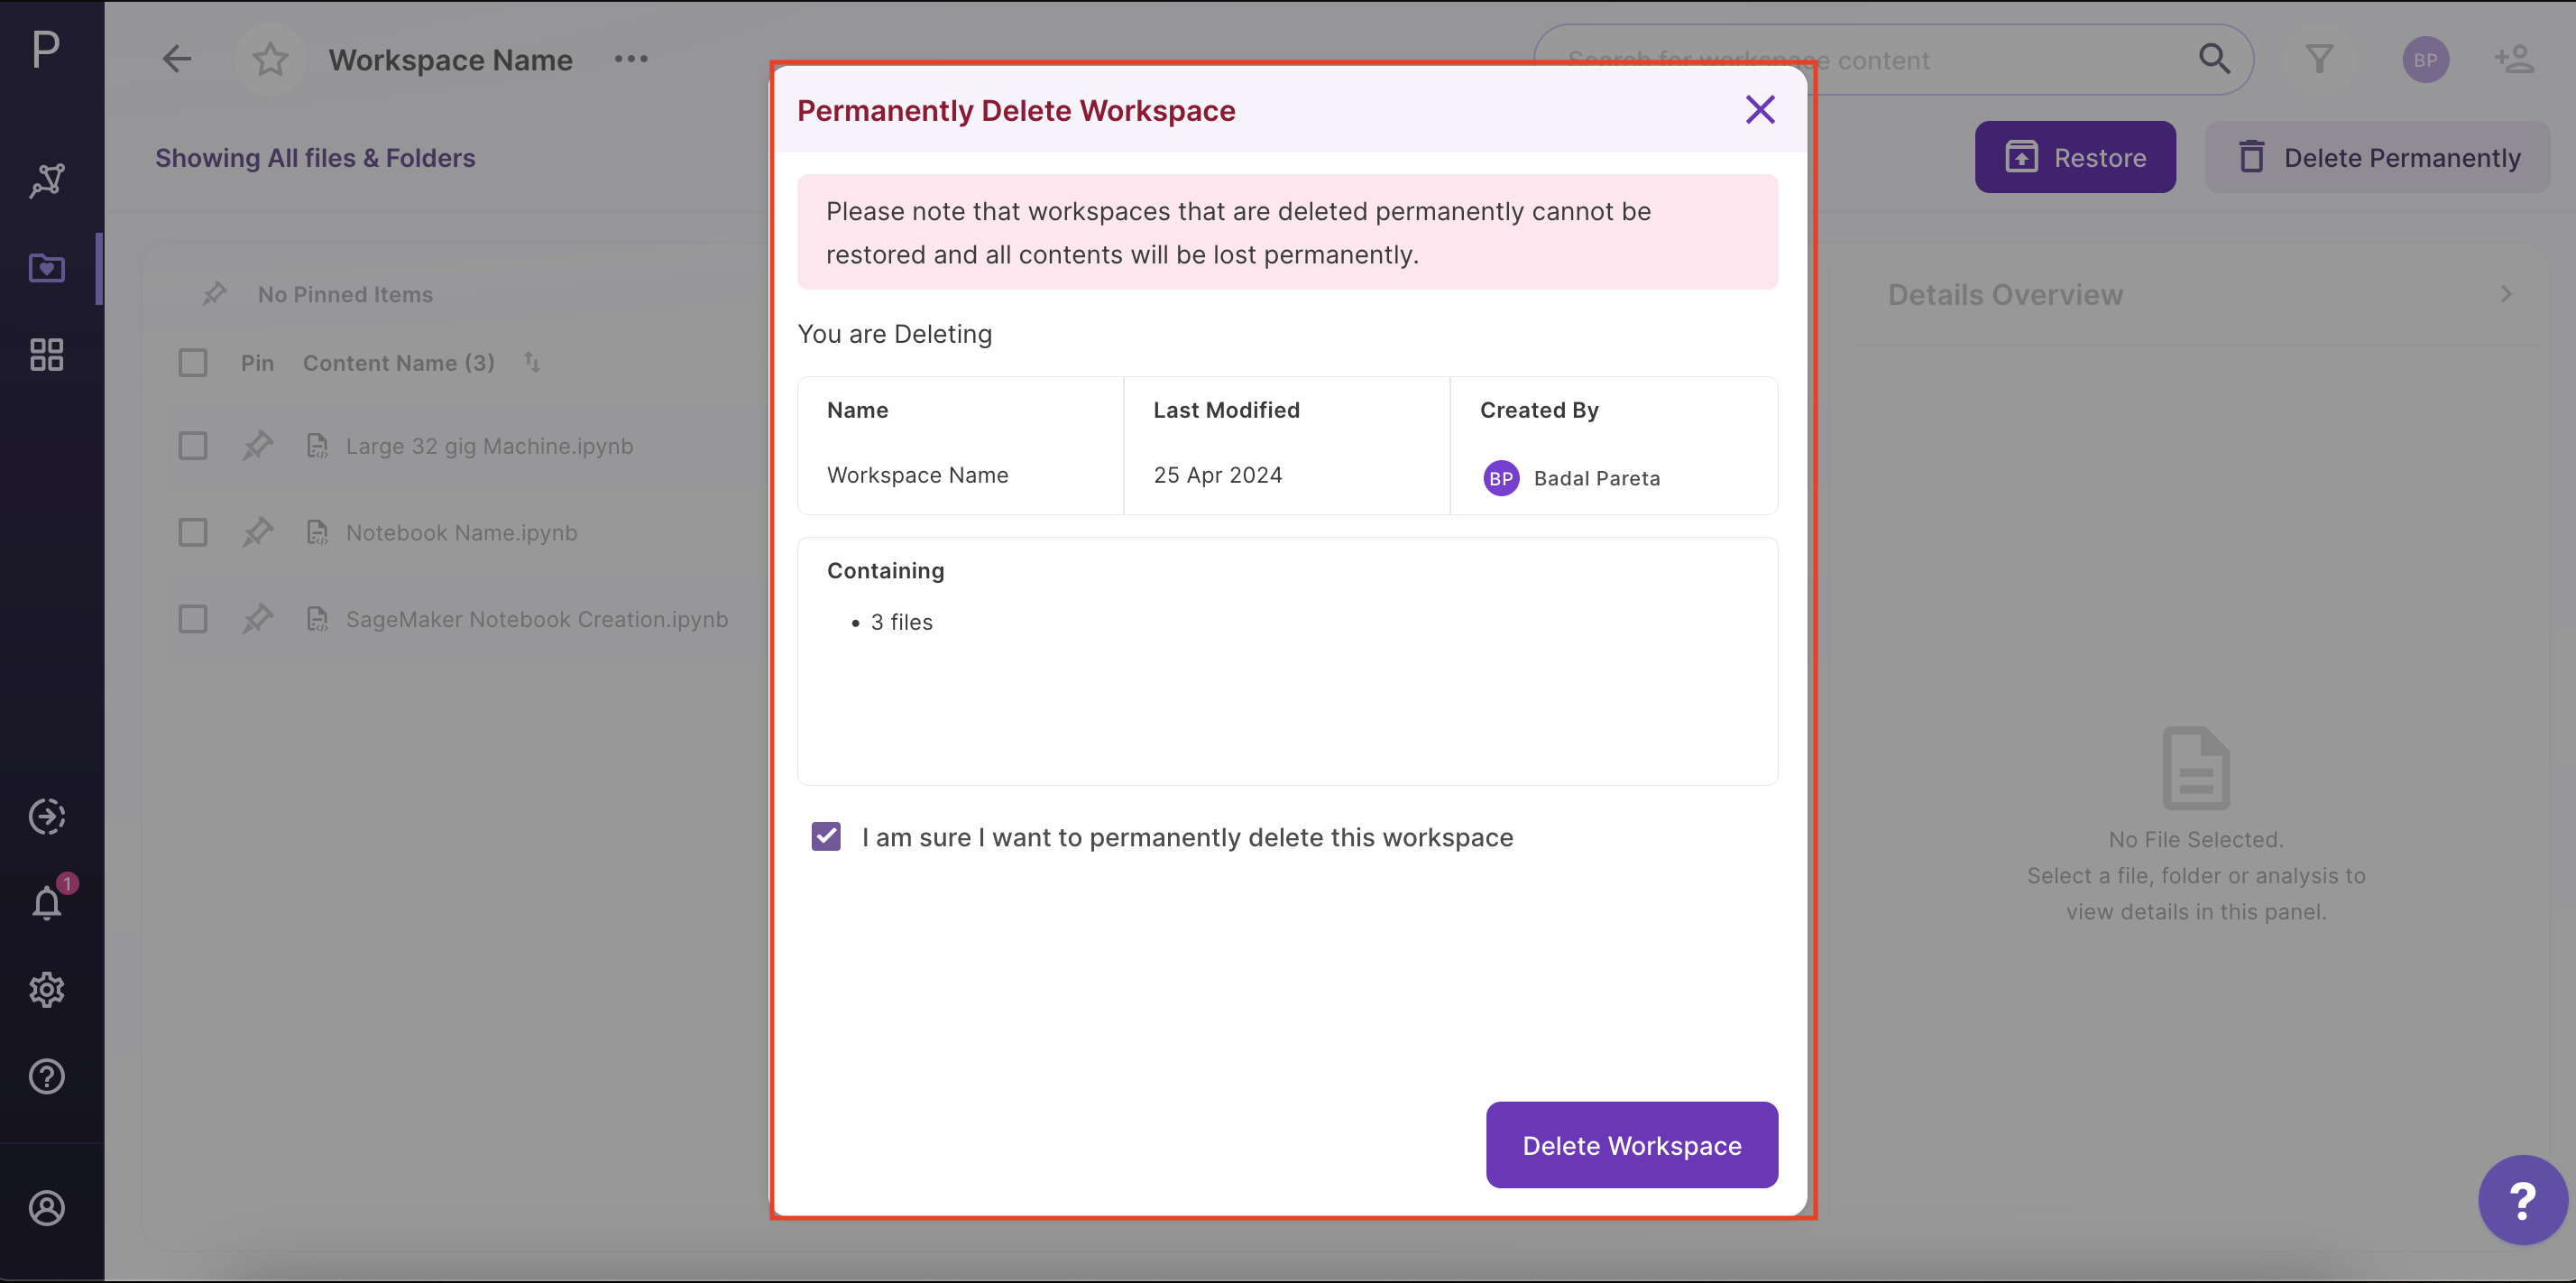
Figure 22. Permanently deleting workspace
Preview File And URL
For previewable file types (For example, csv files, notebooks, images, text files) - when a user clicks on a Workspace content to view details, there is an icon to preview and copy the URL of the workspace.
This option enables the user to share any file/folder/notebook without having to share the whole of the workspace.
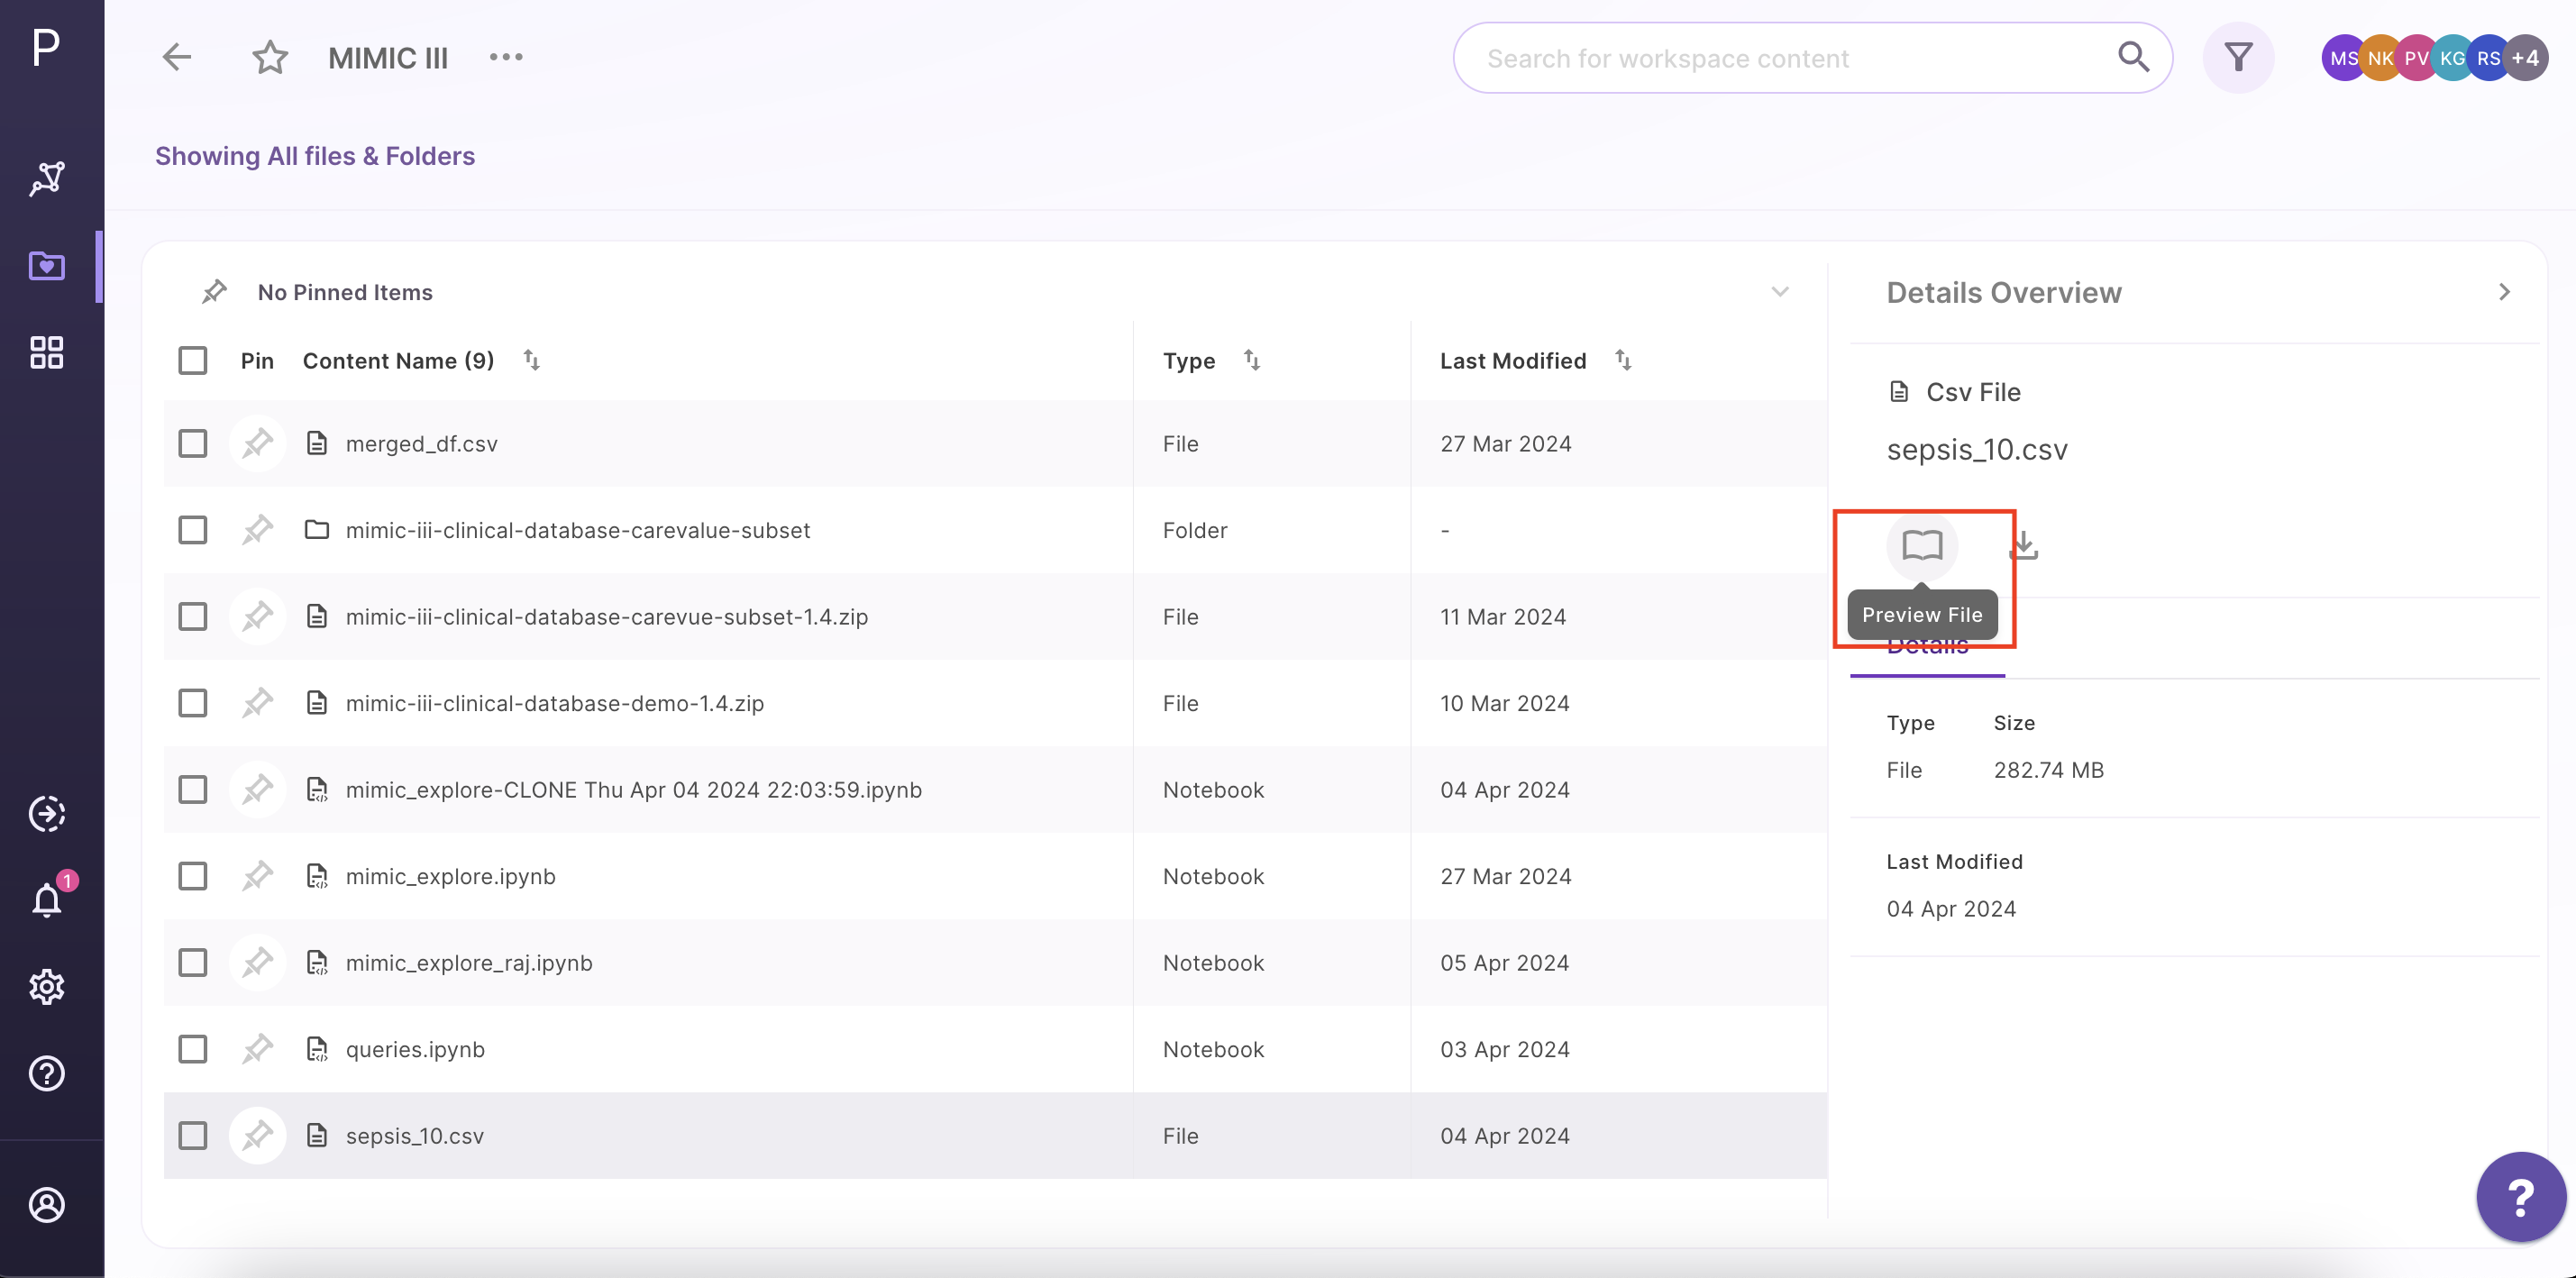
Figure 23. File Preview option
The URL by default has restricted access, i.e the file can be viewed only by users who a part of the workspace and have the link.
The user also has the option to make the file link global i.e anyone with the link on Polly can view the file.

Figure 24. Changing the URL access to restricted/global
Workspace Handling Guidelines and Limits
File supported per workspace ranges from 20000 to 30000
Workspace constraints for smooth usage are as follows:
- Search: There will be minimal to no impact
- Copy: 100 - 110 GB total size with a cap of 100 files within a folder are allowed if done from UI
- Move: Conditions are similar to that of copy
- Delete: There will be no impact